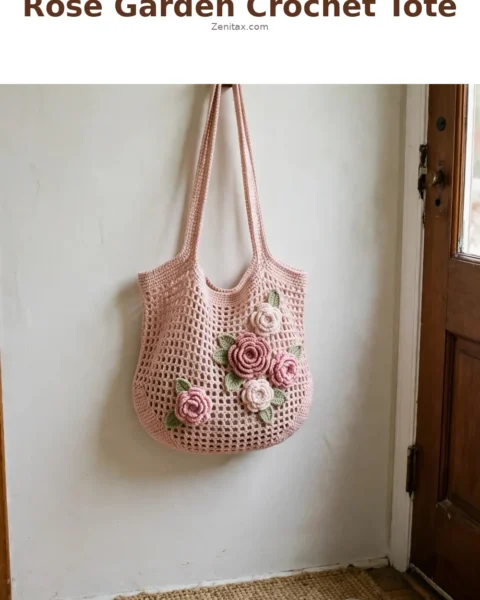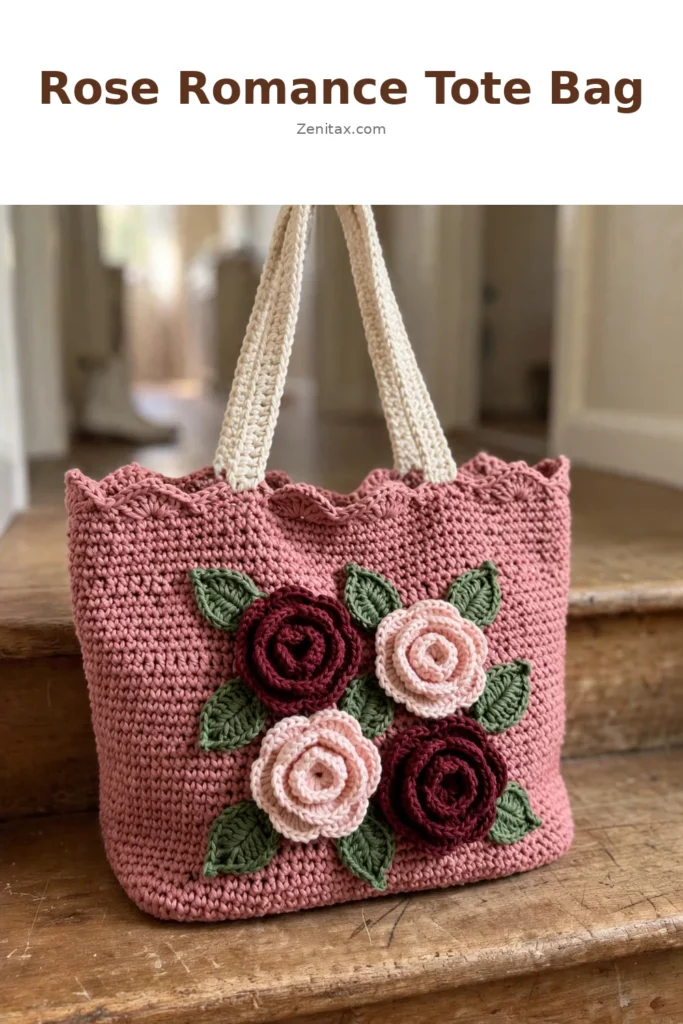
Some bags look complicated. This one just looks it. The Rose Romance Tote Bag is worked almost entirely in single crochet — no colorwork, no cables, no stitch combinations to memorize. The structure comes from smart construction: a flat bottom panel, stitches picked up around the perimeter, and a body worked in continuous rounds. Then the fun part: dimensional roses coiled from simple strips, sewn on with leaves. If you can single crochet and follow row-by-row instructions, you can make this bag.
Why You Will Love This Tote Bag Pattern
The body of this bag uses only single crochet stitches from start to finish. That is the whole secret. The repetitive stitching builds into a dense, sturdy fabric, and cotton yarn does the rest — unlike stretchy acrylic, cotton holds its shape beautifully after blocking, so the finished tote stands upright on its own. Take it on farmers market trips, library runs, or use it to carry your current crochet project around.
The embellishments are where the romance happens. Those dimensional roses look fancy, but each one is just a flat strip coiled up and stitched in place. Make your first one and you will wonder why you ever thought they looked difficult. Four roses in burgundy and pale rose, eight leaves in forest green, arranged in a row across the front panel — that is all it takes.
Materials You Will Need
Yarn (Worsted Weight Cotton, Weight 4)
- Main Color (MC): dusty rose or blush pink, approximately 650 yards
- Color A (CA): deep burgundy or wine, approximately 60 yards
- Color B (CB): light dusty rose or pale blush, approximately 60 yards
- Color C (CC): forest green, approximately 45 yards
- Handle Color (HC): natural or off-white cream, approximately 120 yards
A mercerized worsted-weight cotton works beautifully here — the smooth finish creates a polished, firm fabric. Any worsted-weight cotton that achieves gauge will work.
Hooks
- US Size G-6 (4.0 mm) for the body and appliques
- US Size H-8 (5.0 mm), optional, for the handles if you prefer a different texture
Notions
- At least 4 stitch markers
- Tapestry needle
- Scissors
- Blocking mat and rust-proof pins
- Optional: bag insert or cardboard base cut to 4 x 14 inches for extra structure
Gauge
18 sc x 22 rows = 4 inches / 10 cm worked flat in single crochet with a US G-6 hook, after blocking.
Gauge matters here — it determines whether your bag ends up the right size. To check: chain 24, work single crochet in the second chain from the hook and in each chain across (23 sc). Continue for 26 rows total. Fasten off, wet block, and measure the center 4 inches. Swatch too big? Go down a hook size. Too small? Go up a hook size.
Abbreviations
- ch = chain
- sc = single crochet
- hdc = half double crochet
- dc = double crochet
- sl st = slip stitch
- sc2tog = single crochet two together (decrease)
- st(s) = stitch(es)
- rnd = round
- RS = right side
- WS = wrong side
- rep = repeat
- sk = skip
- MC = Main Color (dusty rose)
- CA = Color A (burgundy)
- CB = Color B (pale rose)
- CC = Color C (forest green)
- HC = Handle Color (cream)
Special Stitches
Scallop Stitch (Top Edging)
- Slip stitch into the first stitch to anchor.
- Chain 1.
- Work 5 dc all into the same stitch — this is your scallop peak.
- Skip 2 stitches.
- Slip stitch into the next stitch.
- Skip 2 stitches.
- Repeat from step 3 across.
Each scallop uses 6 stitches total, and the pattern keeps your final stitch count divisible by 6.
Crochet Rose (Make 4: 2 in CA, 2 in CB)
- With CA or CB and your G-6 hook, chain 36.
- Row 1: Sc in second ch from hook, sc in next ch. Work (hdc, dc, dc, hdc) all in the next ch, then sc in the next 2 ch — this creates one petal. Repeat this 5-stitch petal unit 4 more times across the chain. End with sc in the last 2 ch. You now have 6 petals.
- Hold the strip with the right side facing. Starting at the right end, roll the strip tightly inward on itself, keeping the straight foundation edge at the bottom.
- As you coil, use your working yarn and tapestry needle to tack each rotation to the previous one at the base.
- When fully coiled, secure the end firmly through the base several times. Fasten off.
Each finished rose measures approximately 2 inches in diameter. Leave long tails for sewing.
Crochet Leaf (Make 8 in CC)
- Chain 8.
- Sc in second ch from hook. (1 sc)
- Hdc in next ch. (1 hdc)
- Dc in next 3 ch. (3 dc)
- Hdc in next ch. (1 hdc)
- Work 3 sc in the last ch — this is the leaf tip. Do not turn.
- Work back along the opposite side of the foundation chain: hdc in next ch, dc in next 3 ch, hdc in next ch, sc in next ch.
- Sl st into the starting ch to close. Fasten off, leaving a long tail for sewing.
Each leaf measures approximately 1.75 inches long.
Pattern Instructions
Section 1: Bottom Panel
The bottom panel is worked flat in rows and measures 14 inches wide by 4 inches deep when finished.
With MC and your G-6 hook, chain 64.
Row 1 (RS): Sc in second ch from hook and in each ch to end. Turn. (63 sc)
Rows 2 through 22: Ch 1, sc in each st across. Turn. (63 sc each row)
After Row 22, your panel should measure approximately 4 inches tall and 14 inches wide. Do not fasten off — you will continue directly into the perimeter round.
Section 2: Picking Up Stitches
Work one round of sc around all four sides of the bottom panel. From here you work in continuous rounds with no turning.
Round 1 (Pick Up Round): Do not turn. Working along the top edge of Row 22, ch 1, work 63 sc evenly across. At the corner, work 3 sc in the corner stitch. Rotate 90 degrees and work 1 sc in each of the 22 row ends along the short right edge (22 sc). Work 3 sc in the corner. Work 63 sc along the bottom of the foundation chain. Work 3 sc in the corner. Work 22 sc along the remaining short left edge. Work 3 sc in the final corner. Place a stitch marker in the first stitch. Do NOT join. (182 sc total)
Checkpoint: 63 + 3 + 22 + 3 + 63 + 3 + 22 + 3 = 182. Count your stitches.
Section 3: Bag Body
Round 2: Sc in each sc around, working sc2tog over each center corner stitch and the stitch immediately before it (4 decreases). (178 sc)
Round 3: Sc in each sc around, sc2tog at each of the 4 corner positions. (174 sc)
Round 4: Sc in each sc around, sc2tog at each of the 4 corner positions. (170 sc)
Round 5: Sc in each sc around, sc2tog at each of the 4 corner positions. (166 sc)
Round 6: Sc in each sc around, sc2tog at each of the 4 corner positions. (162 sc)
Corner shaping is complete. Place additional stitch markers at each corner to track the four sides.
Rounds 7 through 72: Sc in each sc around, no increases or decreases. (162 sc each round)
That is 66 rounds of plain single crochet — put on a podcast and enjoy the rhythm. These rounds create approximately 12 inches of body height.
Checkpoint: the bag body should measure approximately 12 inches from the bottom panel to the top edge.
Section 4: Scallop Edging
Round 73 (Scallop Round): With MC, sl st in next st to anchor. Work 5 dc in the same st. Skip next 2 sts. Sl st in next st. Skip next 2 sts. Repeat (5 dc in next st, skip 2, sl st in next st, skip 2) 26 more times until all 162 sts are used. Join with sl st to the first sl st of the round. (27 scallops)
Fasten off and weave in ends.
Section 5: Handles (Make 2)
With HC and your G-6 hook, chain 10.
Row 1: Sc in second ch from hook and in each ch across. Turn. (9 sc)
Rows 2 through 90: Ch 1, sc in each sc across. Turn. (9 sc each row)
Your strip measures approximately 16.5 inches long. Fasten off, leaving a 24-inch tail. Fold the strip in thirds lengthwise and whipstitch the seam closed with the long tail. The finished handle is firm and approximately 0.7 inches wide.
Handle attachment: position each handle so the inner edges sit approximately 3 inches from each side seam, overlapping the top edge by about 2 inches. Sew each handle end to the inside of the bag, stitching a rectangle pattern then an X across it for maximum strength.
Assembly and Finishing
Lay your blocked bag flat with the front panel facing up. Arrange the four roses in a horizontal row approximately 2.5 inches above the base, centered on the front panel: CA rose, CB rose, CA rose, CB rose, spaced about 0.5 inches apart. Tuck 2 leaves beneath each rose, angled outward in a V shape. Pin everything before sewing, then sew each piece securely with the long tails, pulling tails to the inside and weaving in firmly.
Wet blocking is highly recommended for cotton. Submerge the bag in cool water, press out excess water with a towel, and stuff with plastic bags or a rolled towel to hold its shape. Pin out the scallop edging to open the shells. Allow 24 to 48 hours to dry completely. Block the roses and leaves flat before attaching.
Optional base insert: cut cardboard or plastic canvas to 3.75 x 13.5 inches, wrap in fabric if desired, and insert into the base for extra structure.
Size Customization Tips
- Wider bag: add stitches to the starting chain. Each stitch adds approximately 0.22 inches — chain 73 instead of 64 for a bag about 16 inches wide. Keep the final body stitch count divisible by 6 for the scallop edging.
- Taller bag: add rounds to the plain sc body section. Every 5 to 6 additional rounds adds about 1 inch of height.
- Deeper bag: add rows to the bottom panel. Every 5 to 6 additional rows adds about 1 inch of depth.
Time Estimate and Care
Plan for 12 to 18 hours total: about 30 minutes for the bottom panel, 6 to 8 hours for the body, 45 minutes for the edging, 1.5 hours for handles, 2 to 3 hours for roses and leaves, and another hour for assembly. A perfect week or two of evening stitching sessions.
Machine wash on gentle in cool water using a mesh laundry bag, or hand wash with mild detergent. Do not tumble dry. Reshape while damp and air dry flat or stuffed to hold its shape. Store with tissue paper inside to maintain structure.
Final Thoughts
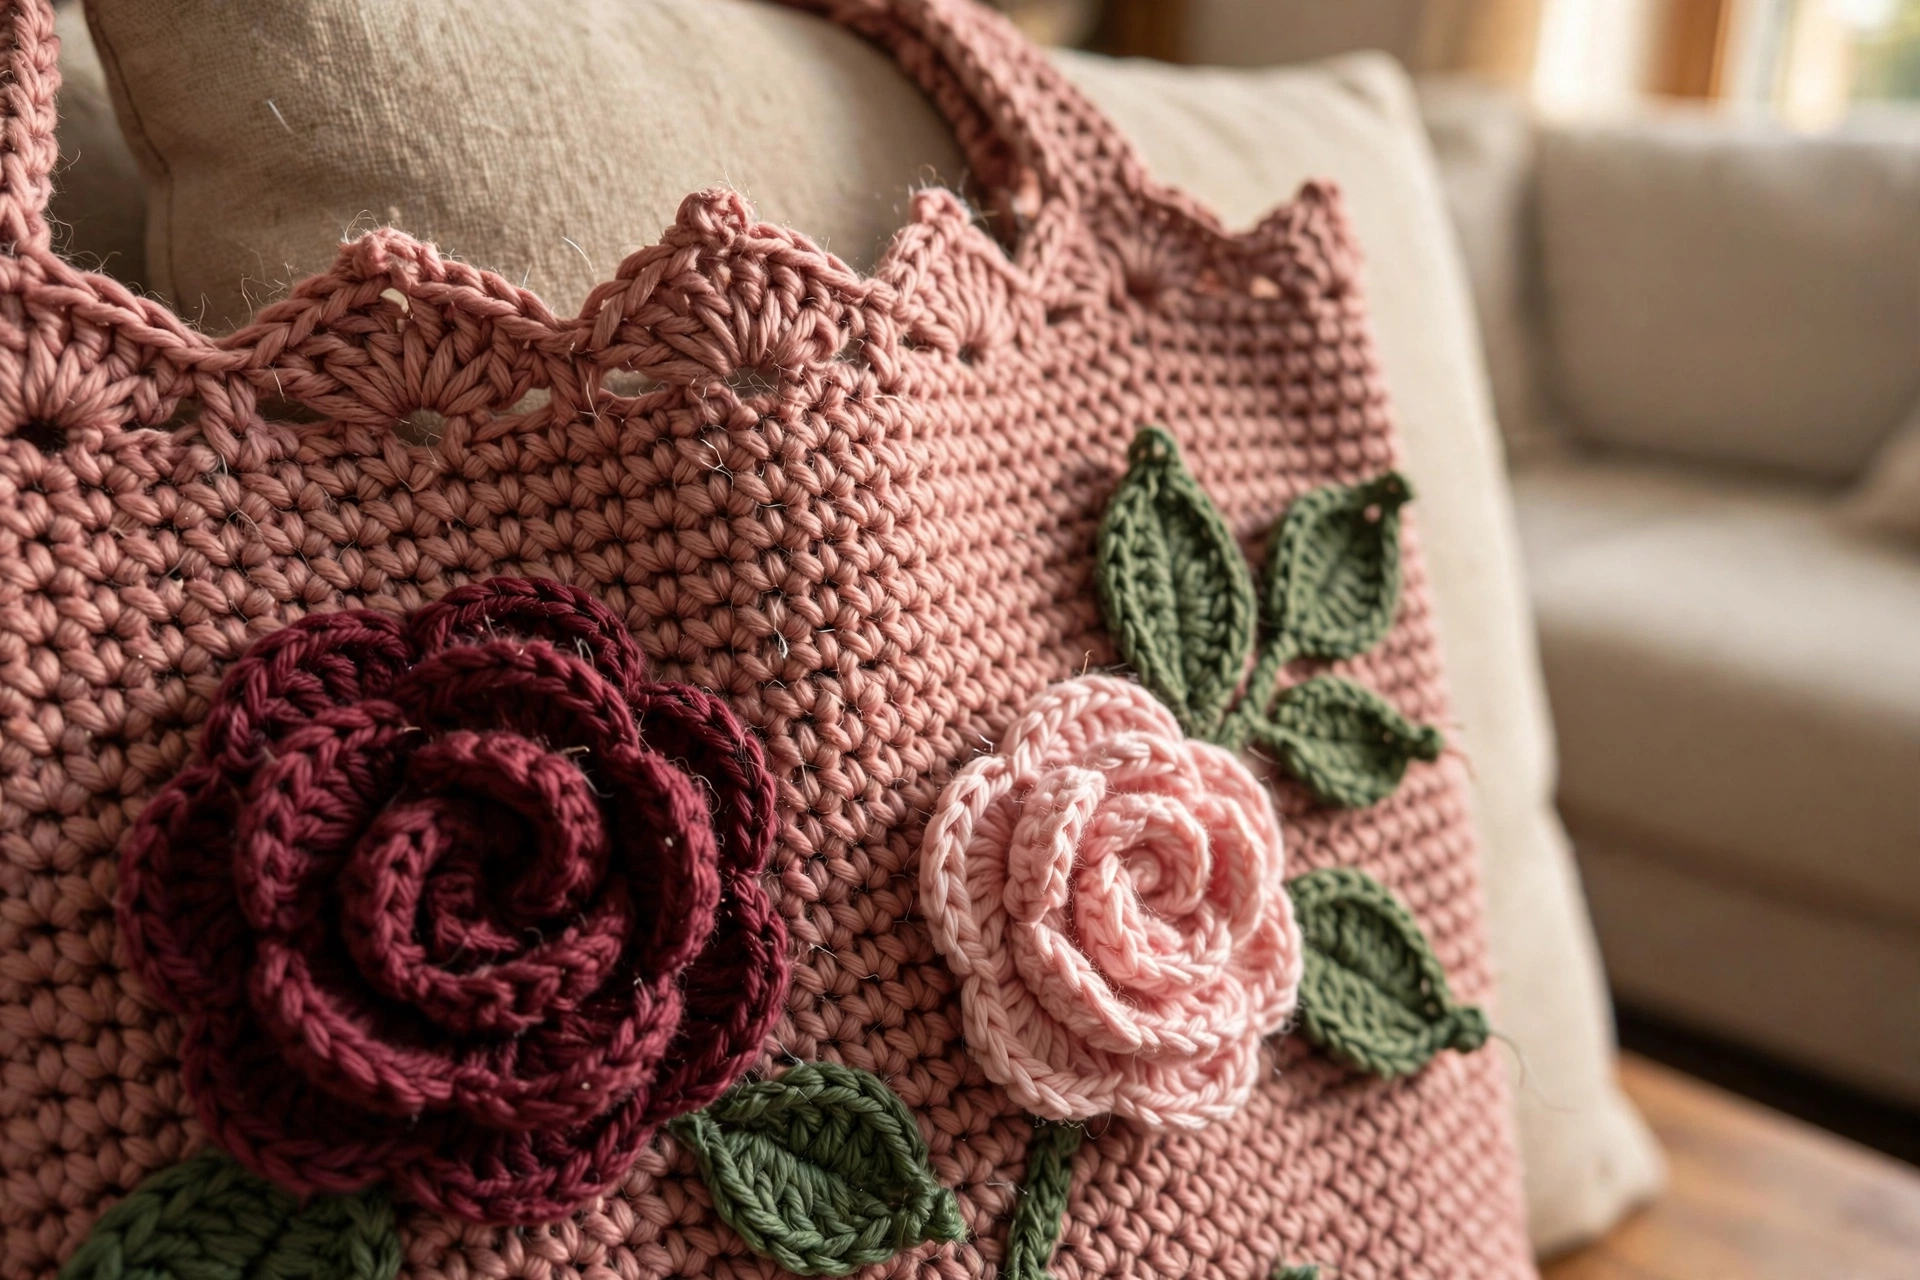
This is the kind of project that earns compliments from people who have no idea how simple the stitches are. The structured body, the scalloped edge, the dimensional roses — it all reads as impressive, and you get there one single crochet at a time. Make the body in a weekend of quiet stitching, spend an evening coiling roses, and you will have a tote that looks far more expensive than the yarn it took.