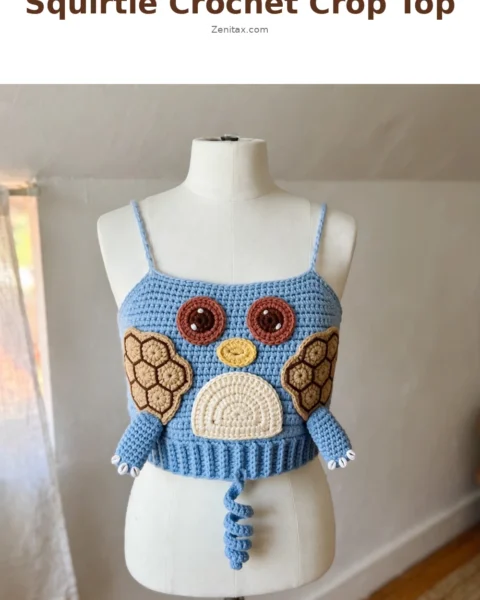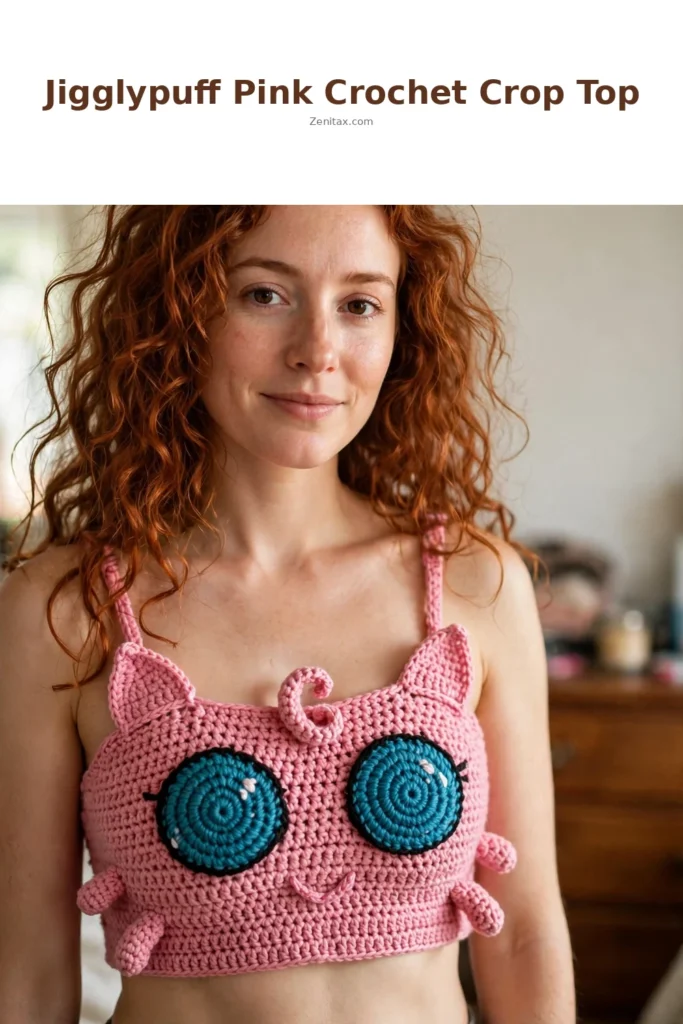
Okay, hear me out: a crop top with cartoon eyes, cat ears, and a forehead curl sounds wild until you actually try it on. Then it just becomes your favorite piece of the summer. This Jigglypuff-inspired crop top is one of those patterns that’s way more wearable than it looks in photos.
The magic is in the construction. The body is plain single crochet worked in the round with gentle waist shaping, so it crochets up fast and fits like a dream. All the character detail — the big teal eyes, the ears, the curl, the little nub arms — are separate appliqués you sew on at the end. Which means you can make the top itself as a plain pink tank first, then add the personality.
Why This Pattern Works So Well
The body uses continuous rounds of single crochet with strategic shaping: decreases at the waist, increases back out at the bust. The front and back panels are divided and worked flat to create the neckline, then straps connect them. The face appliqués are the star — dimensional circles with layered colors, finished with surface slip stitch lash lines.
Materials You’ll Need
Yarn (Main Color, MC): Approximately 500 yards of worsted weight (weight 4) yarn in bubblegum pink
Yarn (Color A): Approximately 60 yards of worsted weight yarn in teal or seafoam green
Yarn (Color B): Approximately 25 yards of worsted weight yarn in bright white
Yarn (Color C): Approximately 15 yards of worsted weight yarn in black
Yarn (Color D): Approximately 10 yards of worsted weight yarn in deep rose or dark pink for the inner ears and mouth
Hook: US Size G-6 / 4.0 mm
Notions:
- Stitch markers (at least 6)
- Yarn needle with blunt tip and large eye
- Scissors
- Polyester fiberfill stuffing in a small amount for the curl and arms
- Straight pins for blocking appliqués
- Sewing pins for positioning appliqués before seaming
- Measuring tape
Yarn Suggestions
Lion Brand Vanna’s Choice in Dusty Rose or Pink Lemonade works beautifully here. The smooth matte finish shows single crochet texture cleanly, which is essential for the graphic character details. Red Heart Super Saver in Pretty ‘n Pink is a budget-friendly option with excellent stitch definition and color consistency across dye lots.
Avoid fuzzy or textured yarns like chenille or boucle. They’ll obscure the stitch definition on the face appliqués and make your Jigglypuff look blurry instead of crisp.
Gauge (Don’t Skip This)
20 sc x 22 rows = 4 in x 4 in / 10 cm x 10 cm, worked in single crochet in continuous rounds, after blocking.
For a garment this fitted, being even half a stitch per inch off will cause the top to fit incorrectly. Make a swatch. Wash and dry it the same way you plan to care for the finished garment. Then measure.
Finished Measurements
This pattern is written for a size Small (32 to 34 inch / 81 to 86 cm bust).
- Circumference at hem: 30 in / 76 cm (negative ease is intentional for a snug fit)
- Circumference at chest: 28 in / 71 cm
- Length from hem to top of front panel (excluding straps): 11 in / 28 cm
- Strap length (adjustable): approximately 12 in / 30.5 cm each
Abbreviations and Stitch Definitions
- ch: chain
- sl st: slip stitch
- sc: single crochet
- sc2tog: single crochet two together (decrease)
- hdc: half double crochet
- dc: double crochet
- BLO: back loop only
- MR: magic ring
- inc: increase (2 sc in same stitch)
- RS/WS: right side / wrong side
Special Stitches
Surface Slip Stitch (for eye outlines): With yarn attached, insert hook from front to back through the fabric, yarn over, and pull up a loop. Insert hook into the next position, yarn over, and pull through both loops. This creates a chain on the surface of your work.
Reverse Single Crochet (Crab Stitch, optional for edging): Work from left to right. Insert hook into the stitch to the right, yarn over, pull up a loop, yarn over, pull through both loops.
Pattern Instructions
Body (worked in the round from hem to underarm)
Foundation: Using MC, ch 151. Being careful not to twist, sl st into the first ch to form a ring.
Rnd 1: Ch 1 (does not count as st here and throughout), sc in each ch around. Sl st to first sc to join. (150 sc)
Switch to working in continuous rounds from here. Place a stitch marker in the first stitch and move it up each round.
Rnd 2: Sc in each st around. (150 sc)
Rnd 3: Working in BLO, sc in each st around. (150 sc) — This BLO round creates a subtle turning ridge at the hem for a clean folded-look edge.
Rnds 4 through 8: Sc in each st around. (150 sc) 5 rounds total
Rnd 9 (first shaping decrease round): Sc in 23 sts, sc2tog, sc in 24 sts, sc2tog, sc in 24 sts, sc2tog, sc in 23 sts, sc2tog, sc in 24 sts, sc2tog, sc in 24 sts, sc2tog. (144 sc)
Rnds 10 through 14: Sc in each st around. (144 sc) 5 rounds
Rnd 15 (second shaping decrease round): Sc in 22 sts, sc2tog, sc in 22 sts, sc2tog, sc in 22 sts, sc2tog, sc in 22 sts, sc2tog, sc in 22 sts, sc2tog, sc in 22 sts, sc2tog. (138 sc)
Rnds 16 through 20: Sc in each st around. (138 sc) 5 rounds
Rnd 21 (third shaping decrease round): Sc in 21 sts, sc2tog, sc in 21 sts, sc2tog, sc in 21 sts, sc2tog, sc in 21 sts, sc2tog, sc in 21 sts, sc2tog, sc in 21 sts, sc2tog. (132 sc)
Rnds 22 through 26: Sc in each st around. (132 sc) 5 rounds
Rnd 27 (fourth shaping decrease round): Sc in 20 sts, sc2tog, sc in 20 sts, sc2tog, sc in 20 sts, sc2tog, sc in 20 sts, sc2tog, sc in 20 sts, sc2tog, sc in 20 sts, sc2tog. (126 sc)
Rnds 28 through 32: Sc in each st around. (126 sc) 5 rounds
Checkpoint: The body now measures approximately 6 inches from the hem fold ridge. Measure around the widest part. The circumference should be approximately 25.2 in / 64 cm. This is the waist-cinch zone.
Rnd 33 (first expansion round): Sc in 20 sts, inc, sc in 21 sts, inc, sc in 21 sts, inc, sc in 20 sts, inc, sc in 21 sts, inc, sc in 21 sts, inc. (132 sc)
Rnds 34 through 36: Sc in each st around. (132 sc) 3 rounds
Rnd 37 (second expansion round): Sc in 21 sts, inc, sc in 22 sts, inc, sc in 22 sts, inc, sc in 21 sts, inc, sc in 22 sts, inc, sc in 22 sts, inc. (138 sc)
Rnds 38 through 40: Sc in each st around. (138 sc) 3 rounds
Rnd 41 (third expansion round): Sc in 22 sts, inc, sc in 23 sts, inc, sc in 23 sts, inc, sc in 22 sts, inc, sc in 23 sts, inc, sc in 23 sts, inc. (144 sc)
Rnds 42 through 44: Sc in each st around. (144 sc) 3 rounds
Second Checkpoint: The body should measure approximately 9 in from the hem ridge. The bust circumference is approximately 28.8 in.
Dividing for Front and Back Panels
Place a stitch marker at the beginning of the round (right side seam) and count 72 stitches forward, placing a second marker (left side seam). The first 72 stitches form the BACK panel. The second 72 stitches form the FRONT panel. Work each panel separately in flat rows.
Back Panel (worked flat in rows)
Attach MC yarn to the first stitch of the back section.
Row 1 (RS): Ch 1, sc across 72 sts. Turn. (72 sc)
Rows 2 through 12: Ch 1, sc across. Turn. (72 sc) 11 rows
Row 13 (neckline shaping): Ch 1, sc in 18 sts. Turn, leaving remaining sts unworked. (18 sc)
You’re now working the right back strap attachment zone. The center 36 sts will be left open for the back neckline.
Rows 14 through 16: Ch 1, sc across 18 sts. Turn. (18 sc) 3 rows
Fasten off. Reattach yarn to the left back section (stitches 55 through 72).
Rows 14 through 16 (left side): Ch 1, sc across 18 sts. Turn. (18 sc) 3 rows
Fasten off.
Front Panel (worked flat in rows)
Attach MC yarn to the first stitch of the front section.
Row 1 (RS): Ch 1, sc across 72 sts. Turn. (72 sc)
Rows 2 through 16: Ch 1, sc across. Turn. (72 sc) 15 rows
The front panel is taller than the back to accommodate the dimensional face appliqués.
Row 17 (front neckline shaping): Ch 1, sc in 18 sts. Turn. (18 sc)
Rows 18 through 20: Ch 1, sc across 18 sts. Turn. (18 sc) 3 rows
Fasten off. Reattach yarn to the right front section (stitches 55 through 72).
Rows 18 through 20 (right side): Ch 1, sc across 18 sts. Turn. (18 sc) 3 rows
Fasten off.
Straps (make 2)
Using MC, ch 61.
Row 1: Sc in the second ch from hook, sc in each ch across. (60 sc)
Row 2: Ch 1, turn, sc across. (60 sc)
Fasten off, leaving a long tail for sewing.
Face Appliqués
Teal Iris (make 2)
Using Color A and MR.
Rnd 1: 6 sc into MR. Pull ring closed. (6 sc)
Rnd 2: Inc in each st around. (12 sc)
Rnd 3: (Sc in 1 st, inc in next st) rep around. (18 sc)
Rnd 4: (Sc in 2 sts, inc in next st) rep around. (24 sc)
Rnd 5: (Sc in 3 sts, inc in next st) rep around. (30 sc)
Rnd 6: (Sc in 4 sts, inc in next st) rep around. (36 sc)
Rnd 7: (Sc in 5 sts, inc in next st) rep around. (42 sc)
Sl st to close. Fasten off, leaving a long tail.
Black Outer Eye Ring (make 2)
Using Color C and MR.
Rnd 1: 6 sc into MR. (6 sc)
Rnd 2: Inc in each st around. (12 sc)
Rnd 3: (Sc in 1, inc) rep around. (18 sc)
Rnd 4: (Sc in 2, inc) rep around. (24 sc)
Rnd 5: (Sc in 3, inc) rep around. (30 sc)
Rnd 6: (Sc in 4, inc) rep around. (36 sc)
Rnd 7: (Sc in 5, inc) rep around. (42 sc)
Rnd 8: (Sc in 6, inc) rep around. (48 sc)
Sl st to close. Fasten off, leaving a long tail.
White Highlight Dots
Large highlight (make 2) using Color B and MR:
Rnd 1: 6 sc into MR. (6 sc) | Rnd 2: Inc in each st around. (12 sc) | Rnd 3: (Sc in 1, inc) rep around. (18 sc)
Sl st to close. Fasten off.
Small highlight (make 2) using Color B and MR:
Rnd 1: 6 sc into MR. (6 sc) | Rnd 2: Inc in each st around. (12 sc)
Sl st to close. Fasten off.
Eye Assembly
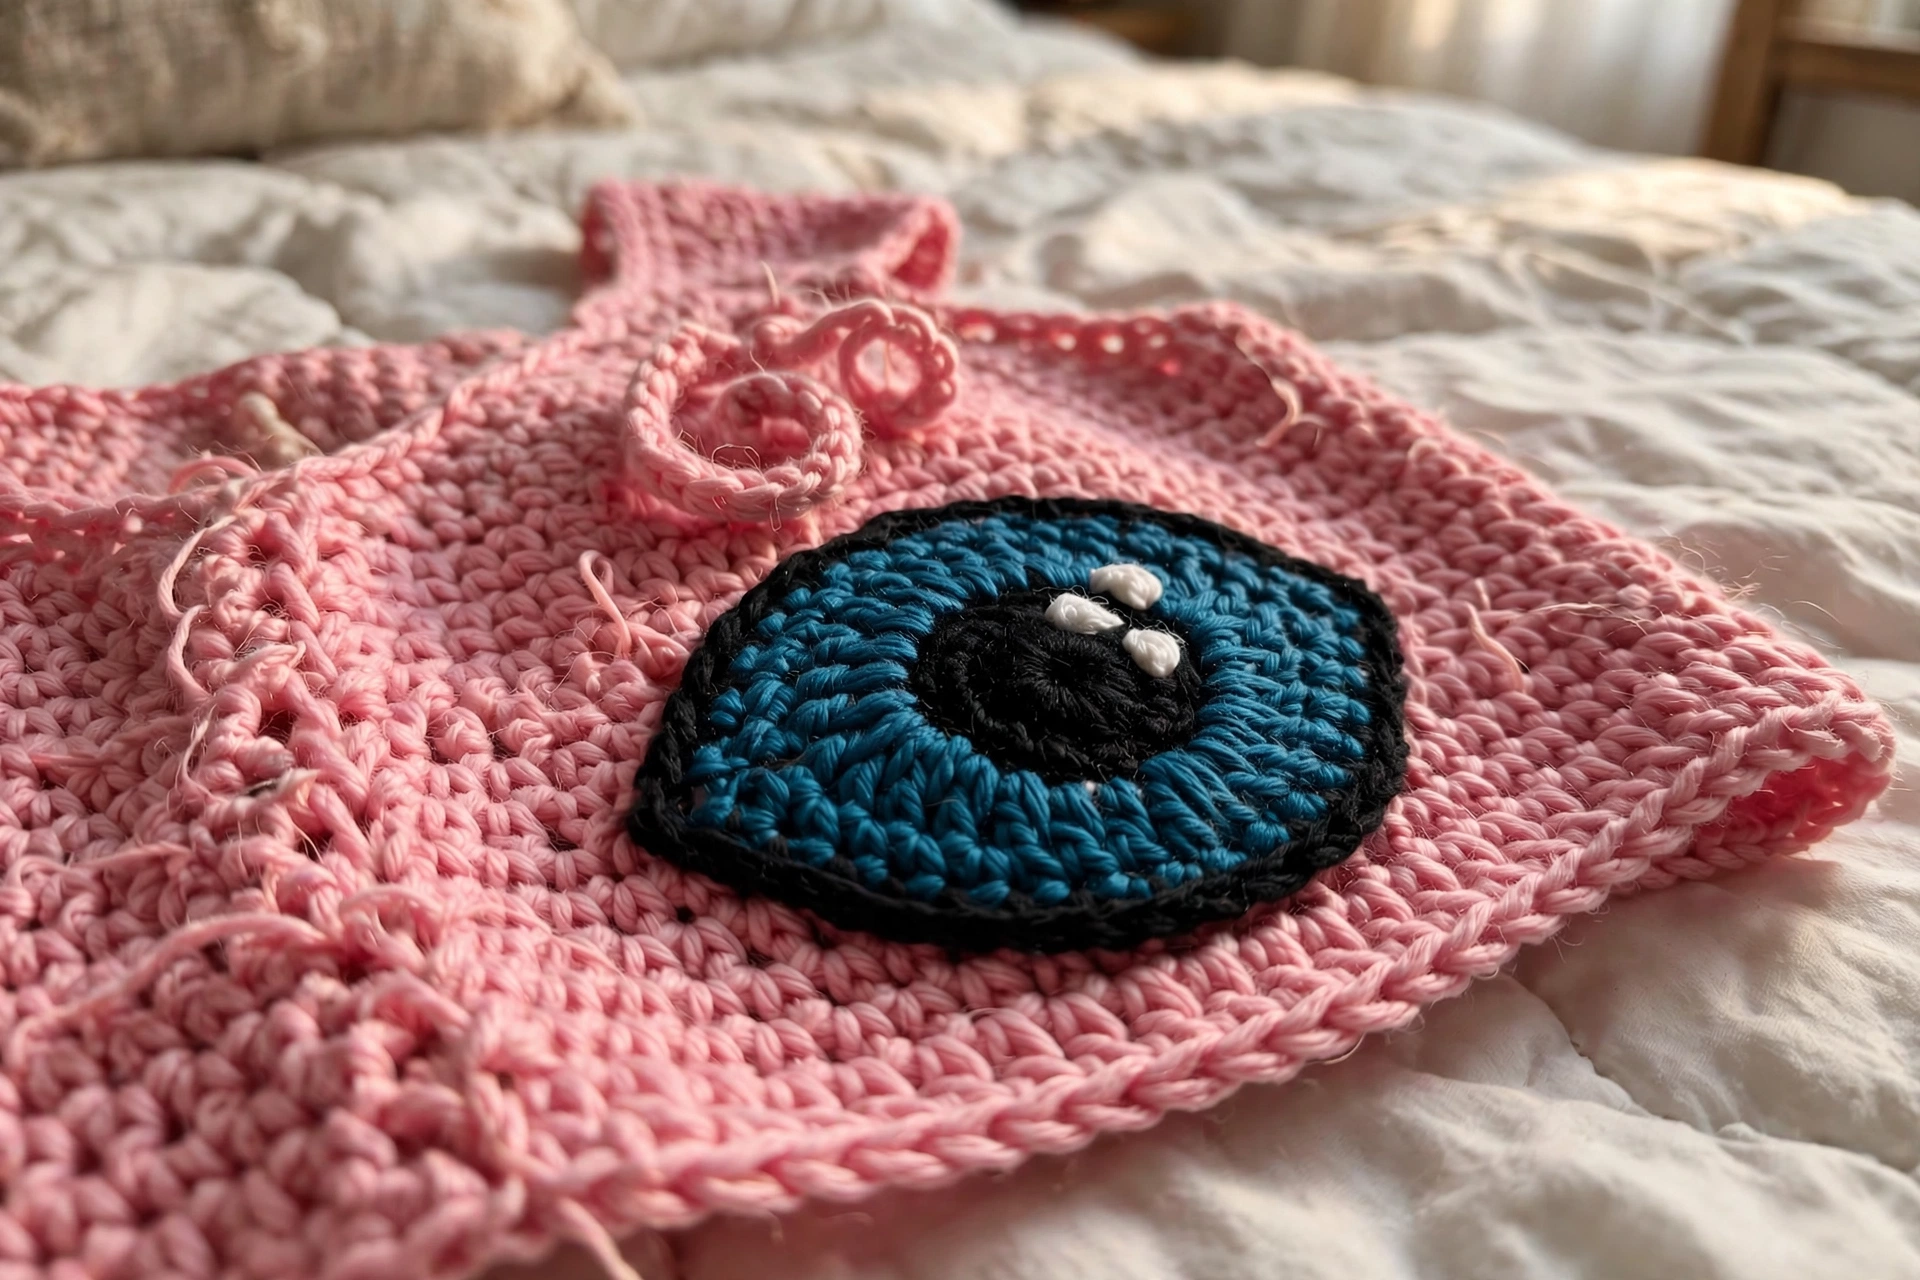
Center the teal iris on the black circle and pin. Using matching teal yarn, whipstitch the iris to the black circle around its entire perimeter. Position the large white highlight at the upper right of the iris and the small white highlight below it. Sew both in place.
Using Color C, work a surface slip stitch along the top arc of the assembled eye (approximately the top 40 percent of the circumference) to create a thick lash line.
Ears (make 2)
Outer Ear using MC:
Rnd 1: MR, 6 sc into ring. (6 sc)
Rnd 2: Inc in each st around. (12 sc)
Rnd 3: (Sc in 1, inc) rep around. (18 sc)
Rnd 4: (Sc in 2, inc) rep around. (24 sc)
Rnd 5: Sc in each st around. (24 sc)
Rnd 6: (Sc in 2, sc2tog) rep around. (18 sc)
Rnd 7: (Sc in 1, sc2tog) rep around. (12 sc)
Do not fasten off. Pinch the top of the ear so the two edges meet to form a pointed triangle shape. Sl st across the 6 pairs of stitches to close the point. Fasten off, leaving a tail.
Inner Ear using Color D: Repeat Rnds 1 through 4 of the outer ear. (24 sc) Fasten off, leaving a tail. Sew the inner ear circle centered onto the flat front face of the outer ear triangle.
Forehead Curl
Using MC, ch 30.
Row 1: Starting in the second ch from hook, sc in 4 sts, hdc in 5 sts, dc in 10 sts, dc 2 in next st, dc in 4 sts, hdc in 4 sts, sc in rem 5 sts. (30 sts worked)
Do not turn. Work along the opposite side of the foundation chain: sc in each ch along the bottom. (30 sc)
Sl st to join. Fasten off, leaving a long tail.
Roll the piece into a tight spiral starting from the narrow end (the sc end). Tack the coil in place with whipstitches through the layers. Add a small pinch of fiberfill if you want it to sit more dimensionally.
Arms / Nubs (make 4)
Using MC and MR.
Rnd 1: 6 sc into MR. (6 sc)
Rnd 2: Inc in each st around. (12 sc)
Rnds 3 through 6: Sc in each st around. (12 sc) 4 rounds
Add a small amount of fiberfill. (Sc2tog) rep around. (6 sc)
Fasten off, leaving a long tail. Draw the tail through the remaining 6 sts and pull tight to close.
Mouth
Using Color D and MR.
Rnd 1: 6 sc into MR. (6 sc)
Rnd 2: Inc in each st around. (12 sc)
Sl st to join. Fasten off, leaving a tail. Pinch into a slight oval. Using black yarn, embroider a small curved line across the top third of the oval.
Assembly and Finishing
- Step 1: Seam the front and back panels. With RS facing out, align the side edges and whipstitch or mattress stitch together.
- Step 2: Attach the straps. Pin each strap end to the corresponding shoulder tab. Try the top on to confirm length before sewing permanently.
- Step 3 (optional): Work one round of reverse single crochet around the neckline and hem for a neat finish.
- Step 4: Position and sew face appliqués. The eyes sit approximately 1.5 in down from the neckline with 1 in between them. The curl goes centered above the eyes. Ears attach at the upper corners. The mouth centers below the eyes.
Care Instructions
Hand wash in cool water with gentle detergent. Press gently between towels to remove excess water. Reshape while damp and lay flat to dry. Do not tumble dry.
Final Thoughts
This top is pure fun to make and even more fun to wear. The body is simple enough to work up in a weekend, and the appliqués are like little mini-projects that keep the whole thing interesting. Take your time positioning the face pieces — pinning everything first and stepping back for a look before you sew makes all the difference. Happy crocheting!