Some projects are just practical. And some are practical AND make you smile every time you pick them up. This one is firmly the second kind.
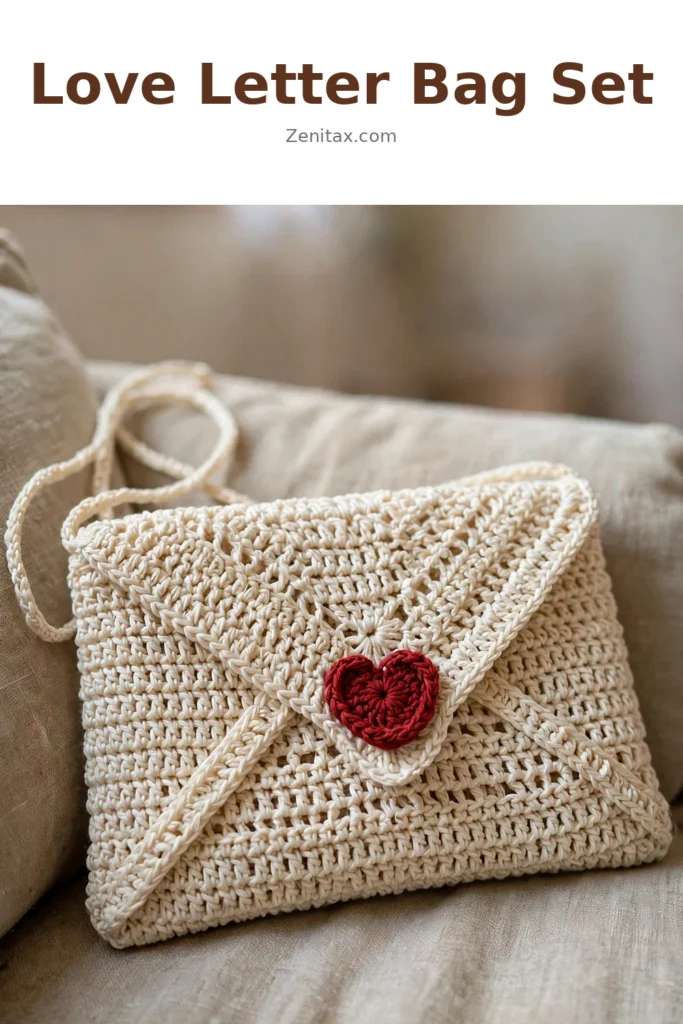
This crochet love letter bag set is exactly what it sounds like: two handbags shaped like folded love letters, each with a pointed envelope flap and a small crocheted heart stitched at its center like a wax seal. One version is worked in open granny-square lace, the other in close-knit moss stitch solidity. Two moods, one set. Keep both or gift one.
I love accessories that say something before I even speak, and this set does exactly that.
About This Love Letter Bag Set
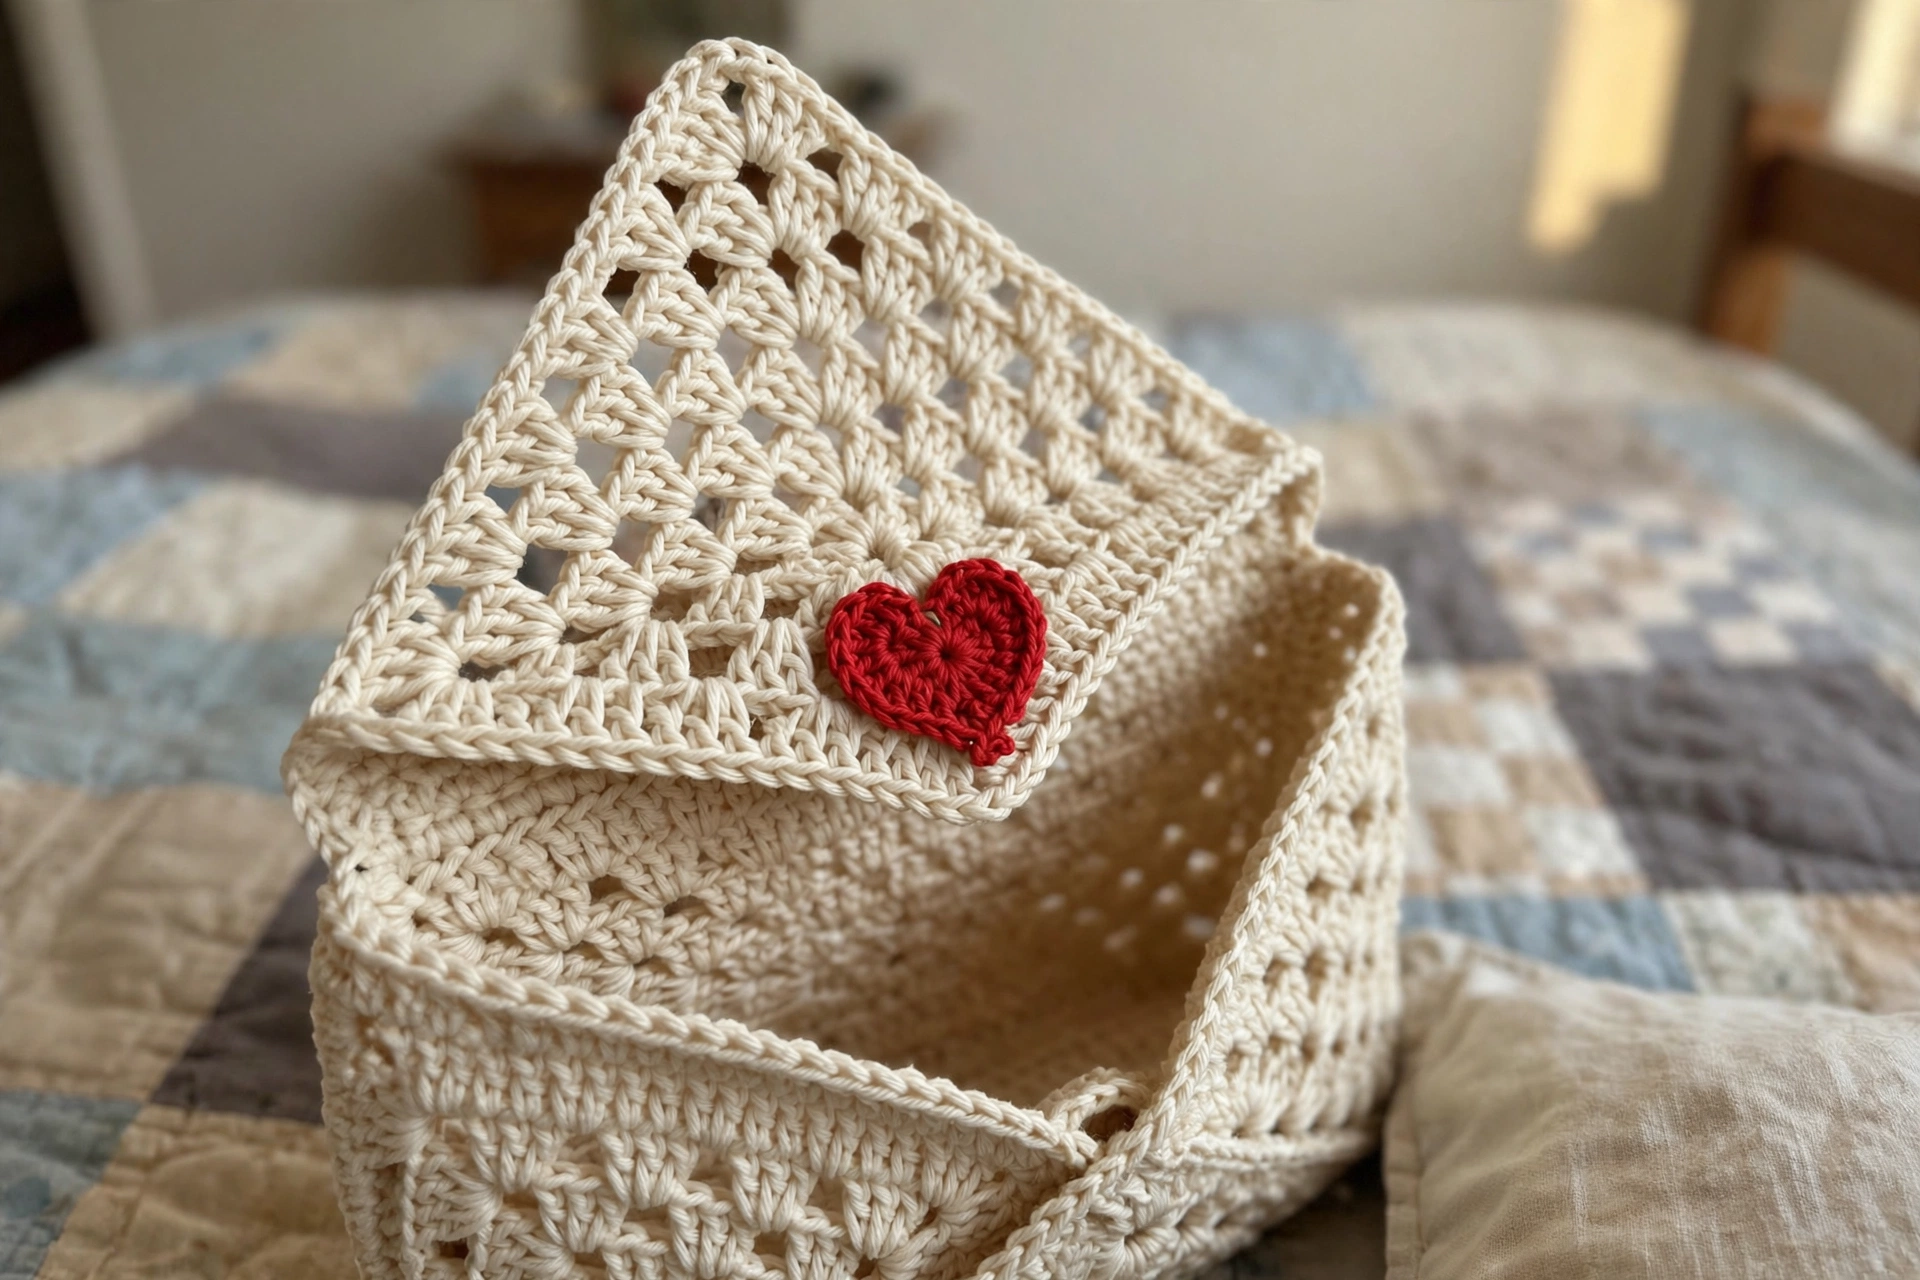
Each bag in the set is shaped like a sealed envelope, complete with a pointed flap that folds down over the front and a small crocheted heart at its center like a wax seal pressed into memory. The lace version has an airy yet structured quality, its granny-square construction letting light pass through the open spaces while still holding its envelope shape. The solid version, worked in dense moss stitch, feels more like a secret kept close, smooth and compact against the body.
Classic cream is the natural starting point for this set, and it photographs beautifully against soft bedding, dried flowers, or an open book. A blush pink strap on the solid version and a deep red heart on the lace version add just enough contrast to make each piece feel considered and intentional. If you want to make the collection your own, try a soft sage body with a burgundy heart, or a warm ivory with a terracotta strap for an autumnal reading-nook aesthetic.
Skill Level
This set is a good fit for confident beginners. Assembly is straightforward: both bags are worked flat in rectangular panels, then folded and assembled through slip-stitched side seams. The pointed envelope flap is shaped gradually through decreases worked at each end of the row, narrowing the panel into its signature triangular point without any complex shaping techniques. The heart appliqué and optional stitch marker buttons are added as a final flourish once the bag is seamed.
If you want a roomier bag, simply add additional rows to the body section before beginning the flap shaping, keeping your heart centered on the new proportions.
Materials and Tools
- Yarn: Worsted weight yarn, enough for two small handbags. A smooth cotton or cotton-blend yarn is ideal, as it captures stitch definition cleanly and gives the finished bag a crisp, polished surface that holds its envelope silhouette well.
- Hook: 5 mm for the lace version (allows the granny clusters to open up with good drape); 4.5 mm for the solid moss-stitch version (slightly tighter gauge for a denser fabric)
- Notions: Yarn needle for assembling the sides and attaching the heart embellishment
Stitch by Stitch
The set draws on a small selection of foundational stitches that build quickly and reward repetition.
- SC (single crochet): The backbone of the solid bag version, worked in alternating offset rows to create the dense, even moss stitch texture across the body and flap.
- DC (double crochet): Used in clusters throughout the lace version to form the open granny-square grid that gives the envelope bag its vintage, romantic quality.
- CH (chain stitch): Creates the spaces between DC clusters in the lace version, and forms the long shoulder strap worked as a simple chain foundation with surface slip stitching.
- SL ST (slip stitch): Used at the assembly stage to join the side seams of the bag, bringing the front and back panels together with a neat, almost invisible seam.
Once you settle into the offset SC rhythm of the solid version or the cluster-and-chain pattern of the lace, the work takes on a meditative rhythm that makes an afternoon disappear in the most satisfying way.
Construction Overview
Both versions of the bag are worked flat in rectangular panels, then folded and assembled into their envelope shape through slip-stitched side seams. The pointed envelope flap is shaped gradually through decreases worked at each end of the row, narrowing the panel into its signature triangular point.
Assembly is straightforward enough for confident beginners, with the heart appliqué and optional stitch marker buttons added as a final flourish once the bag is seamed. If you want a roomier bag, simply add additional rows to the body section before beginning the flap shaping, keeping your heart centered on the new proportions.
Wearing Your Love Letter Bag Set
The lace version pairs effortlessly with a flowy midi dress and sandals for a warm-weather market or a garden picnic, while the solid moss-stitch version tucks neatly under a coat for an evening out or a slow bookshop afternoon. Both bags are sized to carry the essentials: a phone, a few cards, a lip balm, and perhaps a small paperback, which makes them practical companions as much as they are beautiful ones. Finishing this set means you have two bags ready to gift, keep, or alternate between depending entirely on the softness of the day.
Keeping Your Love Letter Bags Looking Their Best
Because both versions are worked in cotton or cotton-blend worsted yarn, they respond well to a gentle hand wash in cool water with a mild soap. Lay each bag flat on a clean towel to dry, reshaping the envelope flap into its point while the fabric is still damp so it dries with crisp, defined edges. Blocking the lace version is particularly worthwhile, as a light misting and gentle pinning will open up the granny clusters and give the finished bag that airy, refined quality you see in finished photographs. Store your bags flat or stuffed lightly with tissue paper to help them keep their envelope shape between uses.
Final Thoughts
Every finished bag in this set is a small, handmade declaration, and the fact that you made it with your own hands makes it more valuable than anything you could buy. Save this crochet love letter bag set to your Pinterest boards so you can find it again, and share your finished bags so others can fall in love with making them too.
I would love to see which version you make first, the lace or the solid. Leave a comment below and tell me your color choices. Happy hooking!