Why You Will Love This Crochet Tote Bag Pattern
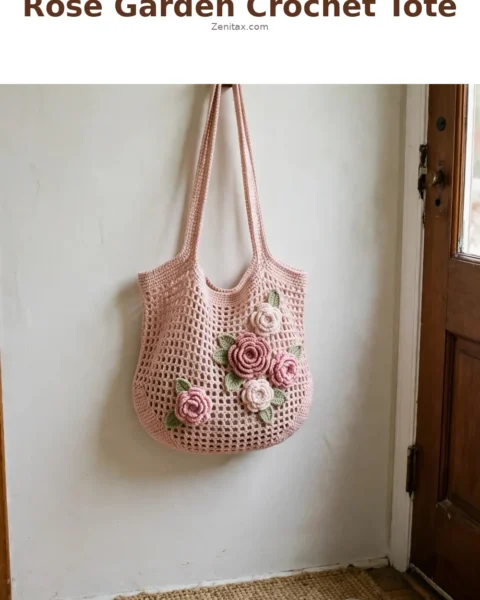
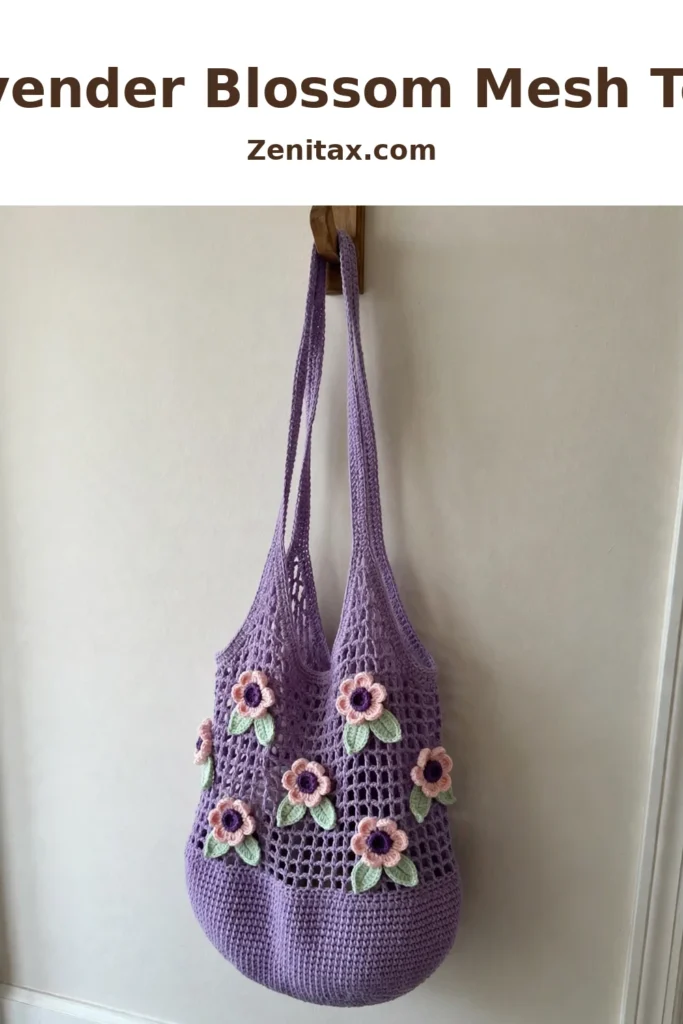
This mesh tote hits that sweet spot between practical and pretty. The solid single crochet base and lower body give you real structure — your things will not poke through or stretch out the bottom. Then the filet mesh upper section keeps everything breathable and lightweight. And those flowers? They are worked separately and sewn on at the end, so you have complete control over placement. Cluster them together for a cottage garden look or space them out for something more minimalist. Trust me, this is the kind of bag that earns compliments everywhere it goes.
The bag measures approximately 14 inches wide by 13 inches tall at the body, with straps measuring about 22 inches each — big enough for a book, wallet, sunglasses, and a few market finds. The rounded hobo-tote shape sits comfortably on your shoulder without digging in.
Skill level: Intermediate. You should be comfortable working in the round, reading a simple mesh pattern, and constructing three dimensional appliques. Nothing here is tricky once you understand the basics.
Time estimate: 12 to 18 hours total, including the applique flowers and finishing.
Materials You Will Need
Yarn
You will need worsted weight yarn (weight category 4) in four colors:
- Main Color (MC) in Lavender: Approximately 700 yards (640 m)
- Contrast Color 1 (CC1) in Light Blush Pink: Approximately 60 yards (55 m)
- Contrast Color 2 (CC2) in Soft Mint Green: Approximately 40 yards (36.5 m)
- Contrast Color 3 (CC3) in Deep Violet: Approximately 30 yards (27.5 m)
Yarn Suggestions
A 100% acrylic worsted with excellent stitch definition works beautifully for the main color — it holds its shape in structured mesh and survives machine washing. A quality aran-style yarn with lovely lavender and purple tones and consistent yardage across skeins is another great choice. A widely available, affordable craft-store acrylic in soft violet is durable and matches the colorway shown. Any smooth worsted weight yarn will work. Avoid fuzzy or textured yarns because they obscure the mesh openings. Cotton or cotton blend yarns produce a stiffer bag that holds its shape well; acrylic gives you softer drape.
Hooks
- US size G-6 (4.0 mm) crochet hook for the body and straps
- US size F-5 (3.75 mm) crochet hook for the applique flowers and leaves
Notions
- Yarn needle for weaving ends and sewing appliques
- At least 4 stitch markers
- Scissors
- Rust-proof straight pins for blocking and positioning appliques
Gauge
Getting gauge right matters for this project — it ensures your finished bag matches the stated dimensions. With the G-6 (4.0 mm) hook: 16 single crochet stitches and 18 rows = 4 inches (10 cm) in single crochet worked in the round. For the filet mesh: 4 mesh squares = approximately 2 inches (5 cm) wide and 4 mesh rows = approximately 2 inches (5 cm) tall. Always swatch before beginning, and adjust your hook size up or down if needed.
Abbreviations and Stitch Definitions
- ch: chain
- sl st: slip stitch
- sc: single crochet
- hdc: half double crochet
- dc: double crochet
- tr: treble crochet
- st/sts: stitch/stitches
- sp: space
- ch-sp: chain space
- sk: skip
- inc: increase (work 2 single crochet stitches into the same stitch)
- beg: beginning
- rep: repeat
- rem: remaining
- RS: right side
- WS: wrong side
- rnd: round
- BLO: back loop only
- MR: magic ring
- pm: place marker
- sm: slip marker
Special Stitches
Filet Mesh Square
Work 1 double crochet (dc) into the dc of the row below, chain 1 (ch 1), skip 1 stitch or chain space. Each dc plus ch-1 counts as one mesh square. When working across the top of the previous mesh row, always work dc into the dc of the previous row and ch 1 over the ch-1 space.
Solid Decrease
Insert hook into next stitch, pull up a loop. Insert hook into following stitch, pull up a loop. Yarn over and draw through all 3 loops on hook. This counts as 1 stitch.
3D Applique Flower
Round 1: Using CC3 and smaller hook, make a MR, ch 1, work 5 sc into ring, sl st to first sc to join, pull ring closed. (5 sc)
Round 2: Ch 1, work 2 sc into each st around, sl st to join. (10 sc)
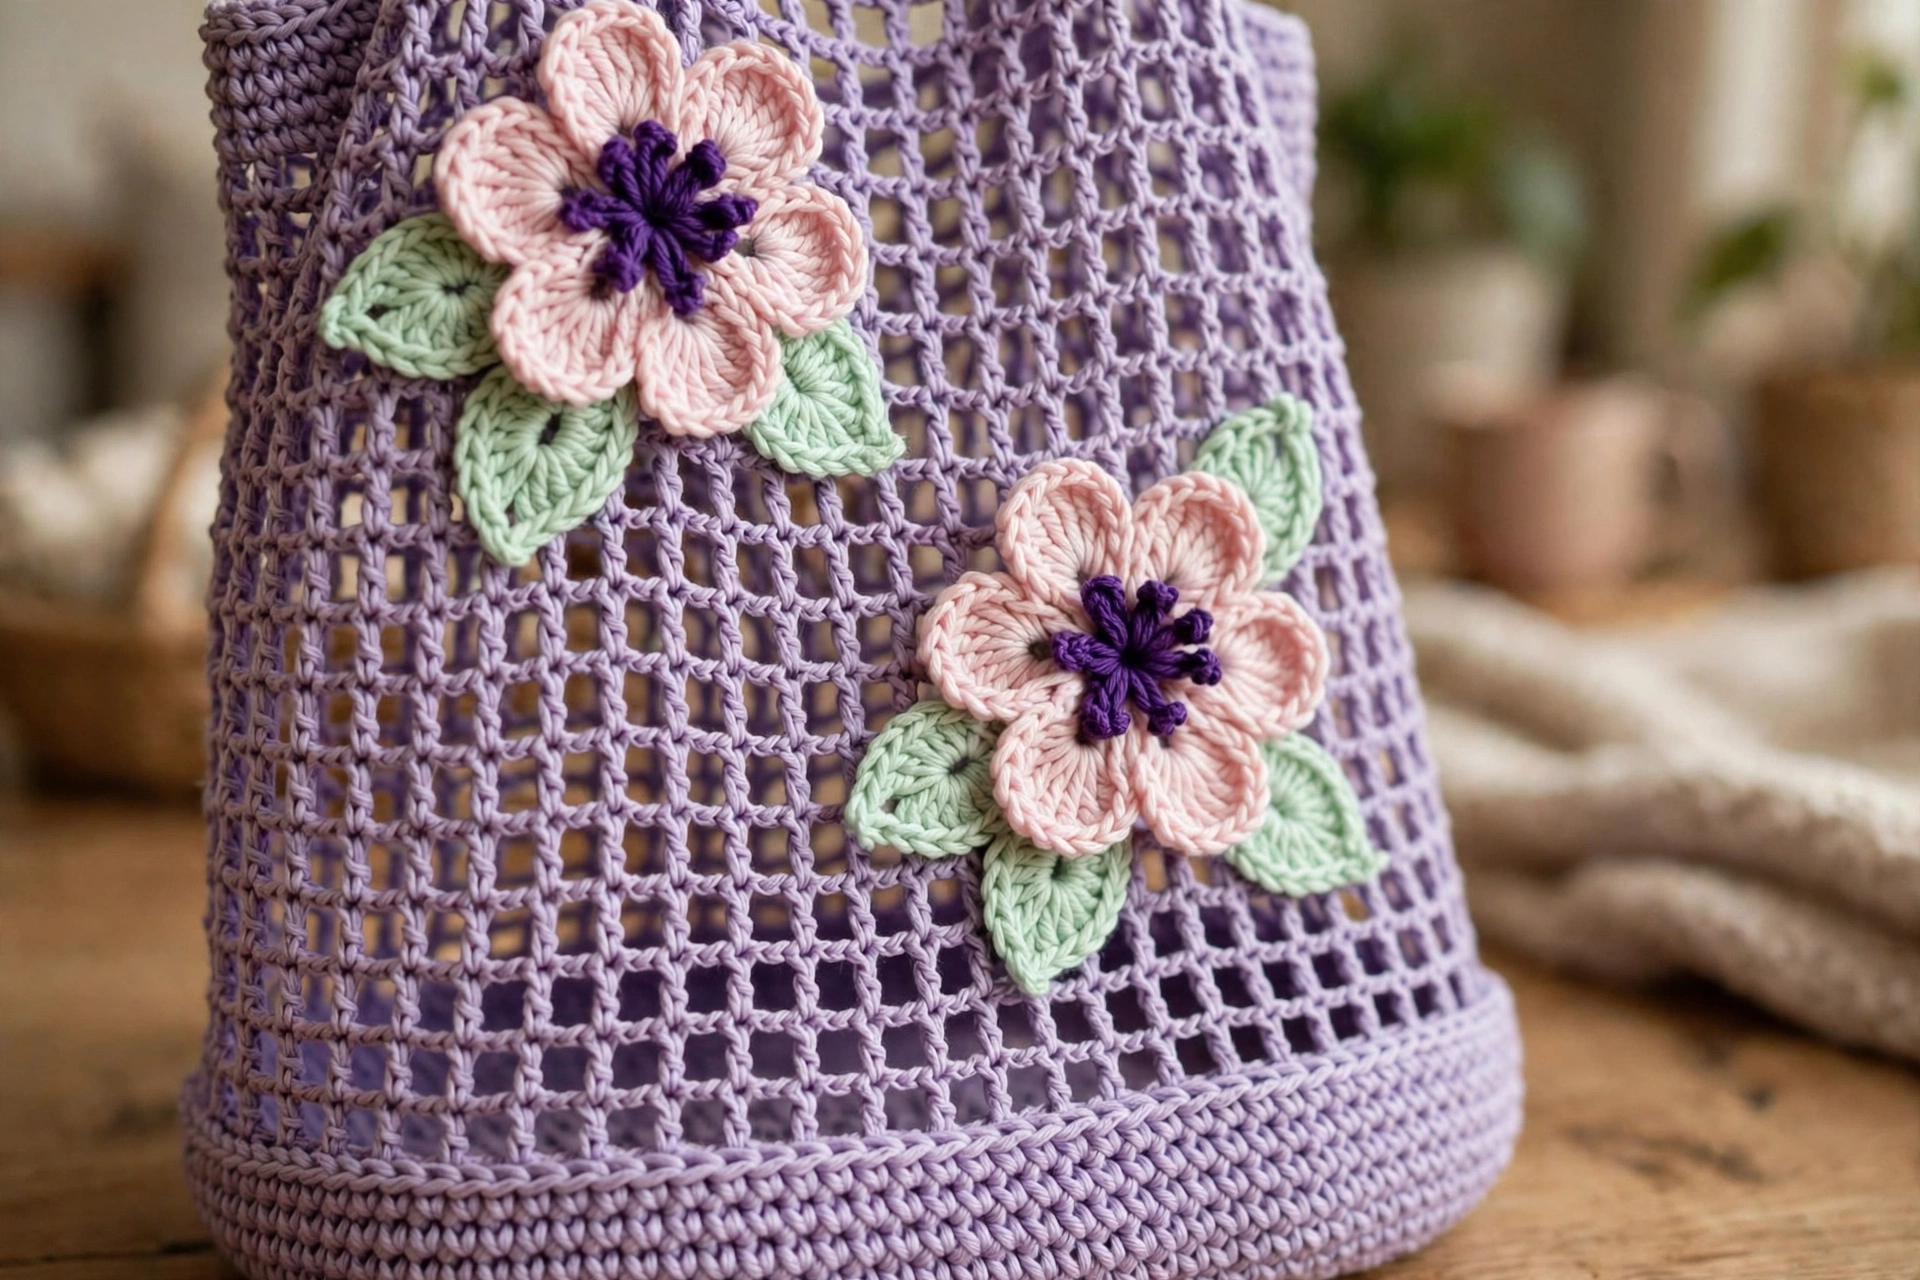
Round 3: Switch to CC1. Ch 1, (sc, hdc, dc, hdc, sc) all into same stitch, sl st into next stitch to form petal. Repeat (sc, hdc, dc, hdc, sc) into next stitch, sl st into following stitch all the way around, ending with sl st into first stitch. You will have 5 petals. Fasten off leaving a tail for sewing.
Leaf
Using CC2 and smaller hook, ch 9.
Row 1: Sc into 2nd ch from hook, sc, hdc, dc, hdc, sc, sc, (sc, ch 2, sc) into last ch for tip. Now work back along the other side of the foundation chain: sc, sc, hdc, dc, hdc, sc, sc, sl st into base of first sc. Fasten off leaving a tail for sewing.
The leaf should have an oval shape with a pointed tip. Each flower is paired with 2 leaves positioned at the base of the flower stem.
Stem Detail
After sewing flower and leaves in place, use CC2 to embroider or surface slip stitch a short stem (approximately 5 to 8 chains or surface sc stitches) connecting the flower center to the leaves.
Pattern Notes Before You Begin
The bag body is worked entirely in the round from the bottom up. The base is a flat oval worked in rounds of single crochet with increases at each short end. The lower body continues in single crochet without increases to build the solid side walls. The upper body transitions to a filet mesh pattern worked in double crochet and chain-1 spaces.
Straps are worked separately and sewn or slip-stitched to the inside top edge. All applique flowers and leaves are worked separately and sewn on after blocking. The bag does not have a closure. The top edge is finished with a round of single crochet to stabilize it.
When joining rounds throughout the solid sections, use a slip stitch to close each round and chain 1 to begin the next round. In the mesh section, use a slip stitch to close each round, chain 3 (counts as first dc), and continue. The right side faces outward throughout — do not turn unless specifically instructed.
Step by Step Crochet Tutorial
Section 1: Base (Flat Oval, Worked in Rounds)
Foundation Chain: With MC and G-6 hook, ch 19.
Rnd 1: Starting in the 2nd ch from hook, sc across 17 sts, work 3 sc into the last ch (this is one short end). Now rotate work and sc back along the other side of the foundation chain for 17 sts, work 3 sc into the very first ch at the other short end. Sl st to first sc of round to join. (40 sc)
Rnd 2: Ch 1, sc into same st, sc across 17 sts, inc into each of the next 3 sts (the 3 sts at first short end), sc across 17 sts, inc into each of the next 2 sts, sc into last st of short end. Sl st to join. (46 sc)
Rnd 3: Ch 1, sc into same st, sc across 18 sts, inc, sc, inc, inc, sc, inc, sc across 18 sts, inc, sc, inc. Sl st to join. (52 sc)
Rnd 4: Ch 1, sc into same st, sc across 19 sts, (sc, inc) twice, sc, (inc, sc) twice, sc across 19 sts, (sc, inc) twice. Sl st to join. (58 sc)
Rnd 5: Ch 1, sc into same st, sc across 20 sts, inc, sc 2, inc, sc, inc, sc 2, inc, sc across 20 sts, inc, sc 2, inc. Sl st to join. (64 sc)
Rnd 6: Ch 1, sc into same st, sc across 21 sts, (inc, sc 3) twice, inc, (sc 3, inc) twice, sc across 21 sts, (inc, sc 3) twice. Sl st to join. (72 sc)
Rnd 7: Ch 1, sc around evenly, sc 2 at each of the 4 short-end corner zones to add 4 total increases distributed evenly around the oval ends. Sl st to join. (76 sc)
Rnd 8: Ch 1, sc around evenly adding 4 increases distributed at oval ends. Sl st to join. (80 sc)
At the end of Round 8, the flat oval base should measure approximately 10 inches (25.5 cm) long and 5 inches (12.5 cm) wide.
Section 2: Lower Solid Body (Worked in the Round, No Increases)
Without turning, continue working in the round in single crochet. Work into the back loop only (BLO) of the last round of the base on the first round of the body wall — this creates a clean fold line and defined bottom edge.
Rnd 9: Ch 1, sc in BLO of each st around. Sl st to join. (80 sc)
Rnds 10 through 22: Ch 1, sc in both loops of each st around. Sl st to join each round. (80 sc per round)
After completing Round 22, the solid body section should measure approximately 5 to 5.5 inches (12.5 to 14 cm) tall from the base fold line. Checkpoint: at this point the bag body from the very bottom of the base to the top of the solid wall should measure approximately 7 to 7.5 inches (18 to 19 cm) total height.
Section 3: Filet Mesh Body (Worked in the Round)
The mesh section is worked in a simple ch-1 filet grid using dc and ch-1 spaces. Each mesh round begins with ch 3 (counts as first dc). The 80 stitch round becomes 40 mesh squares (each square = 1 dc, ch 1) — it works out evenly because 80 divided by 2 equals 40 squares.
Transition Round (Rnd 23): Ch 3 (counts as dc), sk next sc, (dc into next sc, ch 1, sk 1 sc) 39 times. Sl st into top of beginning ch-3 to join. (40 dc, 40 ch-1 sps; 80 working positions total)
Rnds 24 through 37: Ch 3 (counts as dc), (dc into next dc of previous rnd, ch 1) 39 times. Sl st into top of beginning ch-3 to join. (40 dc, 40 ch-1 sps each round)
This creates 15 total rounds of filet mesh (Rounds 23 through 37), measuring approximately 7.5 inches (19 cm) tall. Checkpoint: after the mesh section, the total bag body height from base fold line to top of mesh should measure approximately 12.5 to 13 inches (32 to 33 cm).
Section 4: Top Edge Finish
Finishing Round (Rnd 38): Sl st into first dc of previous rnd. Ch 1, work 1 sc into each dc and 1 sc into each ch-1 sp around evenly. Sl st to join. (80 sc)
This round stabilizes the top opening and gives a clean edge for strap attachment.
Section 5: Straps (Make 2)
Foundation Chain: With MC and G-6 hook, ch 7.
Row 1: Sc into 2nd ch from hook and each ch across. Turn. (6 sc)
Rows 2 through 100: Ch 1, sc across. Turn. (6 sc per row)
After 100 rows, each strap measures approximately 22 inches (56 cm) long and approximately 1.5 inches (4 cm) wide. Fasten off leaving a long tail for sewing.
Strap Attachment: Position the two straps symmetrically on the front and back of the bag. Place the inner edges of each strap approximately 3 inches (7.5 cm) from the center of the bag. Each strap end overlaps the inside top edge by approximately 1 inch (2.5 cm). Pin in place, then use MC yarn and a yarn needle to whipstitch securely around all edges of each strap end, sewing through both the strap and the top edge round of the bag body.
Placement detail: On the front of the bag, the left strap’s right inner edge sits at approximately stitch 18 counting from center front. The right strap’s left inner edge sits at approximately stitch 22, leaving the center 4 stitches open between them. Mirror this placement on the back — this gives the open U-neck silhouette seen in the finished bag.
Section 6: Applique Flowers and Leaves
The finished bag pictured has approximately 9 to 11 flowers distributed across the front, sides, and back, each flower with 2 leaves. For each flower, follow the 3D Applique Flower special stitch instructions using CC1 for petals and CC3 for the center. For each pair of leaves, follow the Leaf instructions using CC2.
After making the desired number of flowers and leaf pairs, block each piece lightly. Arrange them on the bag surface as desired, using straight pins to hold them in place before sewing. Sew each flower down through the center of the flower base using CC3 and a yarn needle, tacking the petal edges lightly so they stand proud of the bag surface for the 3D effect. Sew each leaf pair below the flower, angled outward from a central point to mimic a stem. Embroider a short stem in CC2 between flower base and leaf bases using a chain stitch or running stitch.
Final Thoughts
You made this, start to finish, with nothing but yarn, two hooks, and your own patience — and it is absolutely a bag worth carrying everywhere. Save this pattern to your crochet bag board, experiment with your own flower placement, and share your finished Lavender Blossom Mesh Tote so the handmade community can see your gorgeous work.