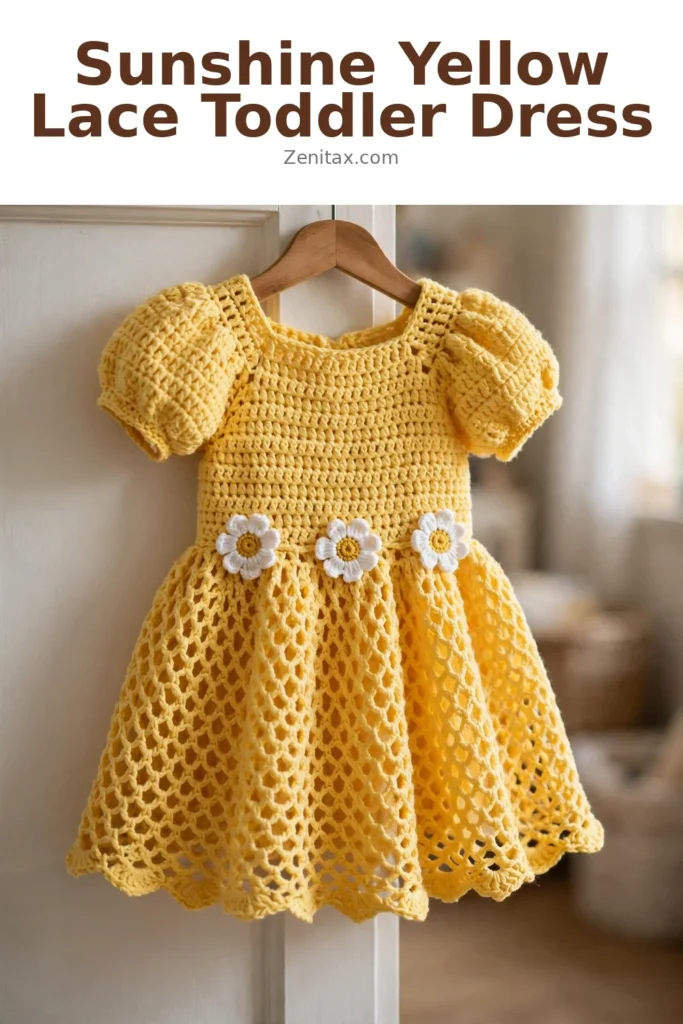
I call this one the Sunshine Dress, and it has quite the story. About three years ago, my sister asked me to make something special for my niece’s second birthday party. She wanted yellow because it was summer, she wanted lace because she loves vintage looks, and she wanted daisies because my niece was absolutely obsessed with picking them from the garden. I sketched the whole thing on a napkin at brunch that day, and that napkin lived in my pattern notebook for years, covered in yarn weight calculations and stitch counts.
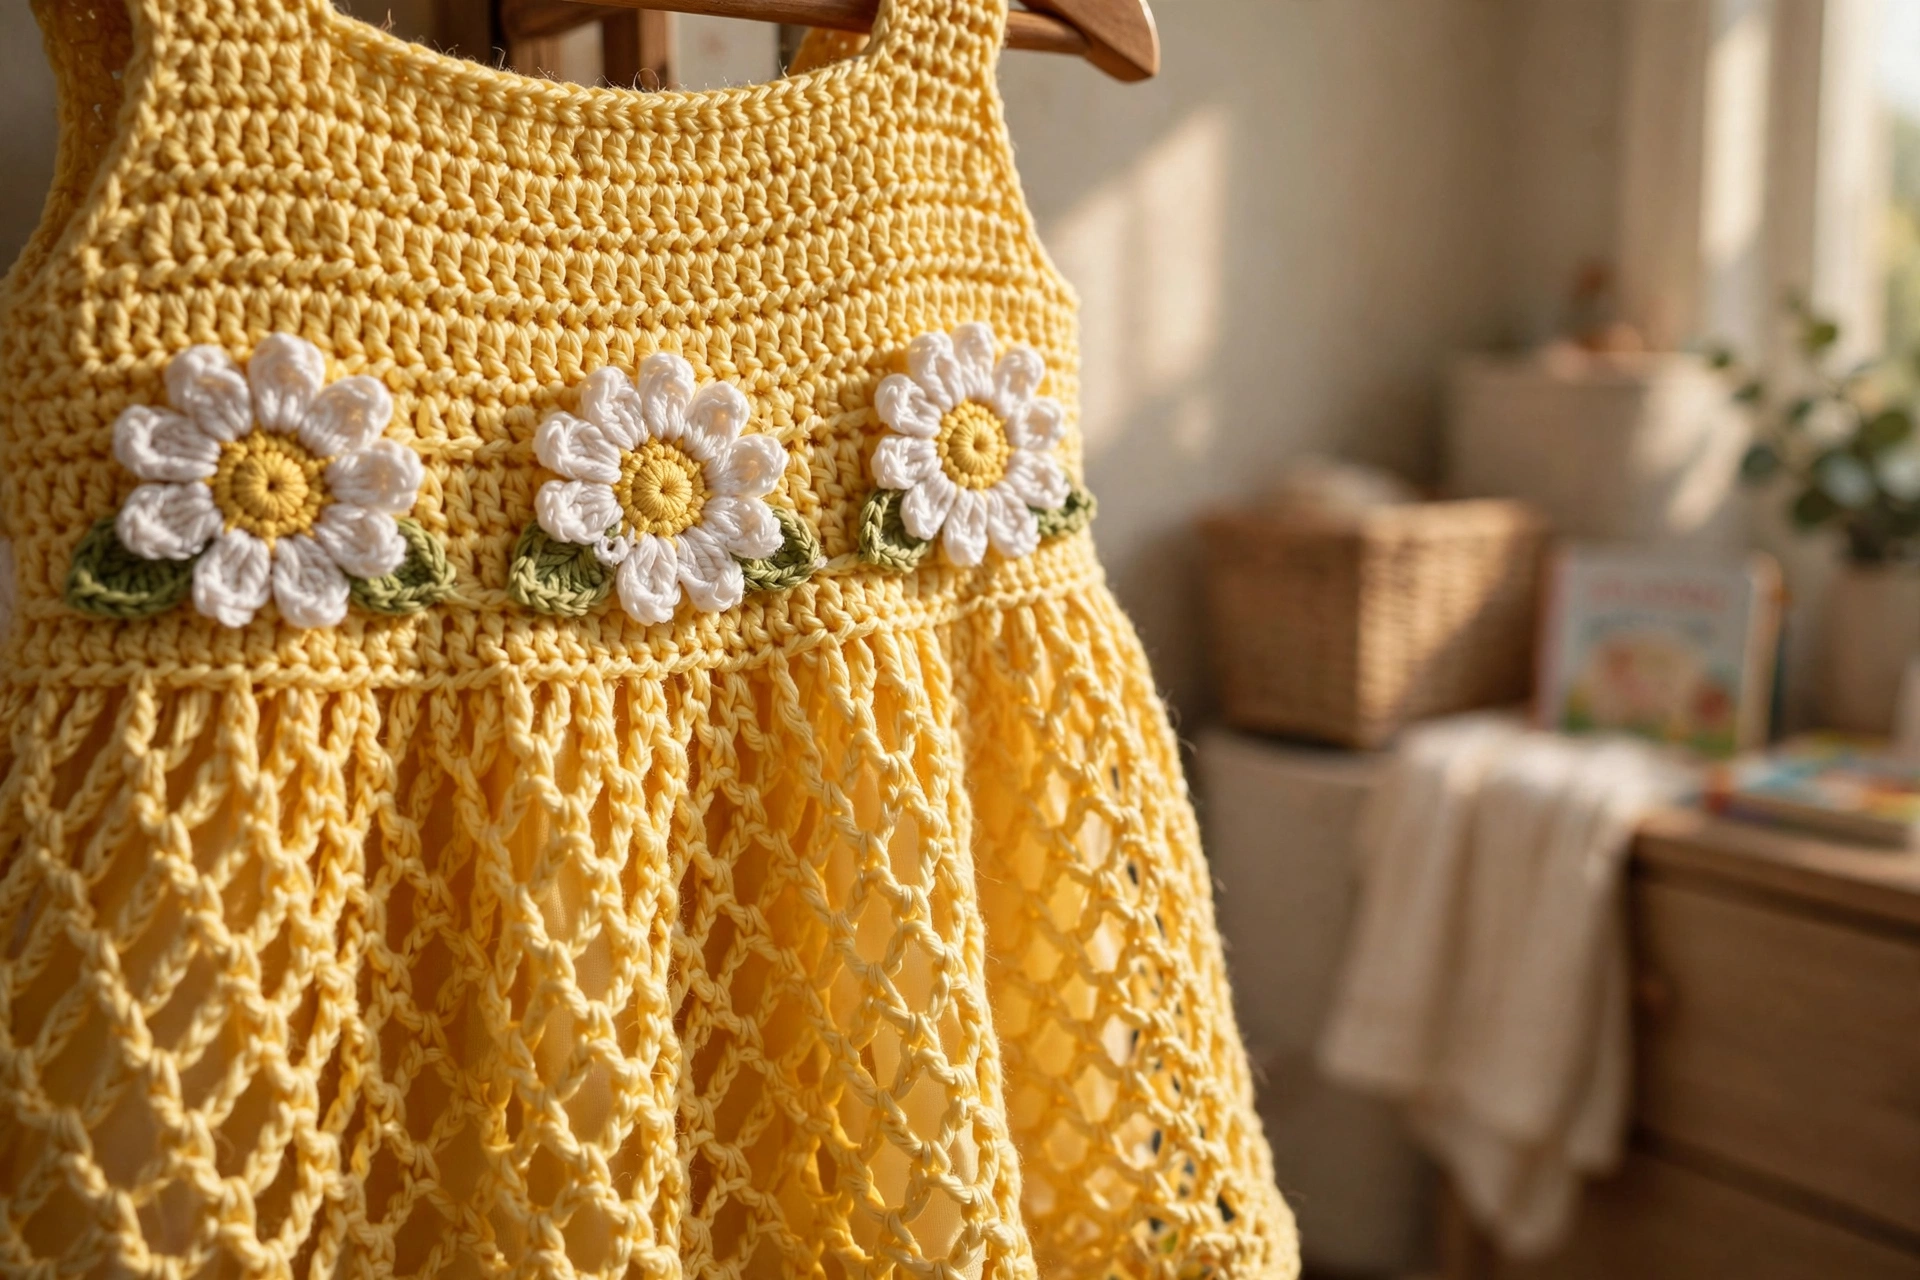
Well, I finally turned that napkin sketch into a proper written pattern. This dress features a fitted bodice with the most darling puffed sleeves, a gorgeous diamond mesh lace skirt that swishes beautifully when a little one twirls, and three sweet crocheted daisy appliques at the waist. It is absolutely an heirloom piece — the kind of dress that gets photographed, saved, and passed down.
Pattern Overview
This toddler dress is written for size 2T, fitting children approximately 24 to 27 months old. The finished dress measures 18 inches from shoulder to hem, with a 20 inch chest circumference. The bodice portion measures 7 inches, the lace skirt adds another 9 inches, and the scallop border contributes a final 2 inches of length.
Let me be upfront about the skill level: this is an intermediate to advanced project. You will need to be comfortable working in the round, reading lace stitch repeats, executing increases for shaped sleeve caps, and constructing small three-dimensional flower appliques. If you have only ever made dishcloths or simple scarves, complete a few smaller lace projects first — a lace headband or a simple doily will get you comfortable with mesh stitches and chain spaces.
Time estimate: plan for 18 to 24 hours of work at a steady pace. Blocking and assembling the appliques will add more time, so give yourself grace with the timeline.
Materials List
Yarn Requirements
You will need fingering weight yarn, also called number 1 super fine (or size 10 crochet thread). I strongly recommend 100% mercerized cotton for the best stitch definition and breathability against little skin.
- Main Color (MC) in yellow: approximately 650 yards / 595 meters
- Contrast Color 1 (CC1) in white (daisy petals): approximately 30 yards / 27 meters
- Contrast Color 2 (CC2) in golden yellow (daisy centers): approximately 10 yards / 9 meters
- Contrast Color 3 (CC3) in green (daisy leaves): approximately 8 yards / 7 meters
A mercerized cotton fingering yarn with a slight sheen makes the lace look luminous. Avoid fuzzy, textured, or halo yarns — they will obscure all that pretty lace stitch definition you worked so hard to create.
Hooks
- US B-1 / 2.25 mm — bodice, sleeves, and border
- US C-2 / 2.75 mm — skirt lace sections
Notions
- 4 small buttons, approximately 3/8 inch / 10 mm diameter
- 8 stitch markers (you will use these constantly)
- Yarn needle for weaving ends
- Blocking mat and rust-proof pins
- Small amount of polyester fiberfill or a cotton ball for stuffing the daisy centers (optional)
- Sewing needle and thread matching your button color
Gauge Information
Getting gauge right is critical for a garment that fits properly. Please swatch before starting.
- Bodice gauge (B-1 / 2.25 mm hook, MC): 22 stitches x 24 rows = 4 inches / 10 cm in single crochet
- Skirt lace gauge (C-2 / 2.75 mm hook, MC): one 12-stitch lace repeat = 2.2 inches / 5.5 cm wide; 6 rows of lace pattern = 2 inches / 5 cm tall
Swatch too small? Your stitches are too tight — go up a hook size. Too large? Go down a hook size.
Abbreviations
- beg = beginning
- BLO = back loop only
- ch = chain
- ch-sp = chain space
- dc = double crochet
- dc2tog = double crochet two together
- hdc = half double crochet
- inc = increase
- MC = main color (yellow)
- CC1 = contrast color 1 (white)
- CC2 = contrast color 2 (golden yellow)
- CC3 = contrast color 3 (green)
- pm = place marker
- rep = repeat
- rnd = round
- RS = right side
- sc = single crochet
- sc2tog = single crochet two together
- sk = skip
- sl st = slip stitch
- sm = slip marker
- sp = space
- st(s) = stitch(es)
- tr = treble crochet
- WS = wrong side
- yo = yarn over
Special Stitches
Puff Stitch (sleeve ruffle)
Yarn over, insert hook into the indicated stitch, yarn over, pull up a loop to about 3/8 inch height. Yarn over, insert hook into the same stitch again, pull up a second loop to the same height. Yarn over, insert hook a third time, pull up a third loop. Yarn over and draw through all 7 loops on your hook. Chain 1 to close and secure the puff (this chain 1 does not count as a stitch).
Shell Stitch (scallop border)
Work 5 double crochets into the same stitch or space. That group of 5 dc forms one shell.
V-Stitch (lace skirt)
Work (dc, ch 2, dc) all into the same stitch or space.
Diamond Mesh Lace Repeat
Each 12-stitch repeat creates a diamond opening framed by solid double crochet posts. The pattern stacks vertically with a half drop offset on alternating rounds, creating that gorgeous diamond trellis appearance.
Construction Order
- Neckline foundation and bodice, worked flat from the top down with a back opening
- Sleeves picked up from armhole openings and worked in the round
- Skirt worked in the round from the waist downward
- Scallop border at the hem
- Daisy appliques constructed separately and sewn on
- Button loops and buttons added to the back opening
The back opening runs about 4.5 inches from the neckline down, allowing the dress to slip over a toddler’s head after unbuttoning — much easier than wrestling a squirmy child through a closed back.
Pattern Instructions
Section 1: Neckline and Yoke
The yoke is worked flat in a single piece from the neckline, with raglan increases creating four sections: left front, right front, left back, right back, and two sleeve caps.
Using MC and B-1 hook, ch 89.
Row 1 (RS): Sc in 2nd ch from hook, sc in each ch across. (88 sc) Ch 1, turn.
Place markers to divide the row:
- Right back: stitches 1 to 14 (14 sts) — raglan marker A after stitch 14
- Right sleeve: stitches 15 to 22 (8 sts) — raglan marker B after stitch 22
- Front: stitches 23 to 66 (44 sts) — raglan marker C after stitch 66
- Left sleeve: stitches 67 to 74 (8 sts) — raglan marker D after stitch 74
- Left back: stitches 75 to 88 (14 sts)
Row 2 (WS): Sc to 1 st before marker A, inc in next st, sm, inc in next st, sc across to 1 st before marker B, inc in next st, sm, inc in next st, sc across to 1 st before marker C, inc in next st, sm, inc in next st, sc across to 1 st before marker D, inc in next st, sm, inc in next st, sc to end. (96 sc) Ch 1, turn.
Each increase row adds 8 stitches total.
Row 3 (RS): Sc in each st across. (96 sc) Ch 1, turn.
Row 4 (WS): Rep Row 2 increase pattern. (104 sc) Ch 1, turn.
Row 5 (RS): Sc in each st across. (104 sc) Ch 1, turn.
Row 6 (WS): Rep Row 2 increase pattern. (112 sc) Ch 1, turn.
Row 7 (RS): Sc in each st across. (112 sc) Ch 1, turn.
Row 8 (WS): Rep Row 2 increase pattern. (120 sc) Ch 1, turn.
Row 9 (RS): Sc in each st across. (120 sc) Ch 1, turn.
Row 10 (WS): Rep Row 2 increase pattern. (128 sc) Ch 1, turn.
Row 11 (RS): Sc in each st across. (128 sc) Ch 1, turn.
Row 12 (WS): Rep Row 2 increase pattern. (136 sc) Ch 1, turn.
Row 13 (RS): Sc in each st across. (136 sc) Ch 1, turn.
Row 14 (WS): Rep Row 2 increase pattern. (144 sc) Ch 1, turn.
Row 15 (RS): Sc in each st across. (144 sc) Ch 1, turn.
Row 16 (WS): Rep Row 2 increase pattern. (152 sc) Ch 1, turn.
Row 17 (RS): Sc in each st across. (152 sc) Ch 1, turn.
Row 18 (WS): Rep Row 2 increase pattern. (160 sc) Ch 1, turn.
After Row 18: right back 30 sts, right sleeve 24 sts, front 60 sts, left sleeve 24 sts, left back 30 sts. Total: 160 sts.
Checkpoint: after Row 18, the yoke should measure approximately 3 inches from the neckline edge.
Section 2: Separating Sleeves from Bodice
Row 19 (RS): Sc across 30 right back sts, ch 4 (underarm bridge), skip 24 right sleeve sts (place on a stitch holder), sc across 60 front sts, ch 4 (underarm bridge), skip 24 left sleeve sts (place on holder), sc across 30 left back sts. (120 sc + 8 ch = 128 working sts) Ch 1, turn.
Row 20 (WS): Sc in each sc and each ch across. (128 sc) Ch 1, turn.
Section 3: Lower Bodice
Rows 21 to 38: Sc in each st across every row, no shaping. (128 sc) Ch 1, turn at end of each row.
After Row 38, the bodice measures approximately 7 inches from the neckline. Do not fasten off.
Section 4: Waistband and Gather Setup
The gather row reduces stitches to a multiple of 12 for the lace skirt. Target: 156 stitches in the round.
Gather Round: with RS facing, join MC with sl st at the right back lower edge. Work sc across the 128 sts, evenly increasing 28 sts: (sc in next 4 sts, inc in next st) 28 times, sc in remaining 8 sts. Sl st to first sc to join. (156 sc) Place marker at the join.
Section 5: Skirt Lace (C-2 / 2.75 mm hook)
Skirt Round 1: Ch 3 (counts as dc), dc in next st, (ch 2, sk 2 sts, dc in next 2 sts) across to last 10 sts, ch 2, sk 2, dc in next 2 sts, ch 2, sk 2, sl st to top of beg ch-3.
Skirt Round 2: Sl st into ch-2 sp. Ch 4 (counts as dc + ch 1), dc in same ch-2 sp, ch 1, [V-st in next ch-2 sp, ch 1] 12 times, sl st to 3rd ch of beg ch-4. (13 V-sts)
Skirt Round 3: Sl st into ch-2 sp of first V-st. Ch 3 (counts as dc), 4 dc in same sp, ch 2, [5 dc in ch-2 sp of next V-st, ch 2] 12 times, sl st to top of beg ch-3. (13 groups of 5 dc)
Skirt Round 4: Ch 5 (counts as dc + ch 2). Sk 2 dc, dc in next dc (center dc of group), ch 2, sk 2 dc, [dc in ch-2 sp between groups, ch 2, sk 2 dc, dc in center dc of next 5-dc group, ch 2, sk 2 dc] 12 times, sl st to 3rd ch of beg ch-5. (26 dc + 26 ch-2 spaces)
Skirt Round 5: Sl st into ch-2 sp. Ch 3 (counts as dc), dc in same sp. Ch 2, [2 dc in next ch-2 sp, ch 2] 25 times, sl st to top of beg ch-3. (26 groups of 2 dc)
Skirt Round 6: Ch 3 (counts as dc). Dc in next dc, ch 3, sk ch-2 sp, [dc in next 2 dc, ch 3, sk ch-2 sp] 25 times, sl st to top of beg ch-3. (26 pairs of dc)
Skirt Round 7: Ch 3 (counts as dc). Dc in next dc, ch 2, sc in ch-3 sp, ch 2, [dc in next 2 dc, ch 2, sc in ch-3 sp, ch 2] 25 times, sl st to top of beg ch-3. (26 pairs dc + 26 sc)
Skirt Round 8: Sl st to ch-2 sp before sc. Ch 3. 2 dc in same ch-2 sp, dc in sc, 2 dc in next ch-2 sp, [ch 1, 2 dc in ch-2 sp before next sc, dc in sc, 2 dc in ch-2 sp after sc] 25 times, ch 1, sl st to top of beg ch-3. (156 st positions)
Skirt Increase Round A: Ch 3 (counts as dc), work across, increasing 24 sts evenly by working 2 dc into every 6th stitch position. (180 sts)
Repeat Skirt Rounds 1 through 8 using 15 repeats around 180 sts.
Skirt Increase Round B: Increase 24 sts evenly. (204 sts)
Repeat Skirt Rounds 1 through 8 using 17 repeats.
Skirt Increase Round C: Increase 12 sts evenly. (216 sts)
Repeat Skirt Rounds 1 through 8 using 18 repeats.
Checkpoint: the skirt should measure approximately 9 inches from the waist gather round.
Section 6: Scallop Border (B-1 / 2.25 mm hook)
Border Round 1: Ch 1 (does not count as st). Sc evenly around the hem, maintaining 216 sts. Sl st to first sc. (216 sc)
Border Round 2: Ch 1. (Sc in next sc, sk 1 sc, 5 dc in next sc, sk 1 sc) 54 times. Sl st to first sc. (54 scallops)
Border Round 3: Sl st into first dc, sl st into 2nd dc, sl st into 3rd dc (center dc of shell). Ch 3 (counts as dc), 4 dc in same center dc, (sc in sc between shells, 5 dc in center dc of next shell) 53 times, sc in sc between last shell and first shell, sl st to top of beg ch-3. (54 shells)
Border Round 4: Sl st into first dc of shell, sl st into 2nd dc, sl st to center dc. Ch 1, sc in same center dc. (Ch 4, sc in center dc of next shell) 53 times. Ch 4, sl st to first sc. (54 ch-4 arches)
Fasten off. Weave in end.
Section 7: Sleeves
Return to the 24 held sleeve stitches. Using B-1 hook and MC, join yarn to the center underarm point.
Setup Round: Pick up and sc 2 sts across the 4-ch underarm bridge, sc across the 24 held sleeve sts, pick up and sc 2 sts across the remaining 2 ch of the bridge. Sl st to first sc. (28 sc) Place marker.
Sleeve Round 1: Sc in each st around. (28 sc)
Sleeve Round 2: (Sc in next 2 sts, inc in next st) 9 times, sc in next st. (37 sc)
Sleeve Rounds 3 to 5: Sc in each st around. (37 sc)
Sleeve Round 6: (Sc in next 5 sts, sc2tog) 5 times, sc in next 2 sts. (32 sc)
Sleeve Ruffle Round 1: Ch 2 (does not count as st). (Puff st in next st, ch 1, sk 1 st) 16 times. Sl st to first puff st. (16 puff sts)
Sleeve Ruffle Round 2: Sl st into ch-1 sp. Ch 3 (counts as dc). 4 dc in same ch-1 sp. (Sc in top of next puff st, 5 dc in next ch-1 sp) 15 times, sc in top of last puff st. Sl st to top of beg ch-3. (16 shells)
Fasten off. Repeat for the second sleeve.
Section 8: Back Opening and Button Band
Button band (left back as worn): join MC with sl st at the bottom of the left back opening edge.
Row 1: Work sc evenly up the left back edge, approximately 27 sc. Ch 1, turn.
Row 2: Sc in each sc across. (27 sc) Ch 1, turn.
Row 3: Sc in each sc across. (27 sc) Fasten off.
Buttonhole band (right back as worn): join MC with sl st at the top of the right back opening edge.
Row 1: Work sc evenly down the right back edge, approximately 27 sc. Ch 1, turn.
Row 2: Sc in first 2 sts, (ch 2, sk 2 sts, sc in next 4 sts) 4 times, sc in remaining st. (4 buttonholes) Ch 1, turn.
Row 3: Sc in each st and 2 sc in each ch-2 sp across. (27 sc) Fasten off.
Sew 4 buttons to the button band aligned with the buttonholes.
Section 9: Neckline Finish
Join MC with sl st to the right back neckline corner (RS facing). Work sc evenly across the neckline chain edge, approximately 88 sc. Sl st to first sc. Do not turn. Work 1 round of reverse sc (crab stitch) from left to right across all neckline sts. Sl st to first reverse sc. Fasten off.
Section 10: Daisy Appliques (Make 3)
Daisy center (CC2): magic ring. Ch 2, work 12 hdc into ring, sl st to first hdc. Pull ring closed. (12 hdc) Fasten off, leave a 6-inch tail.
Daisy petals (CC1): join CC1 with sl st to any hdc of center. (Ch 7, sl st back into base of ch forming a petal loop, sl st to next hdc of center) 12 times. (12 petals) Fasten off.
Leaves (CC3, make 2 per flower if desired): ch 8, sl st to 2nd ch from hook, sc in next ch, hdc in next ch, dc in next 2 ch, hdc in next ch, sc in last ch. Fasten off. (7 sts, leaf shape)
Placement: position all 3 daisies in a horizontal row at the center front waist, approximately 1 inch below the waist seam, with about 0.25 inches between each flower. Tuck leaves under the outer edges. Sew firmly through the flower centers.
Optional Hair Bow
Using MC and B-1 hook, ch 31.
Row 1: Sc in 2nd ch from hook and each ch across. (30 sc) Ch 1, turn.
Rows 2 to 12: Sc in each st across. (30 sc) Ch 1, turn.
Fasten off. Fold the rectangle so short ends meet at center. Pinch at center, wrap MC yarn tightly around the pinch point 8 times, tie off securely. Attach to a hair clip or headband.
Size Customization Tips
- For size 3T to 4T: add 2 additional raglan increase rows before separation. Increase underarm bridge chains to 5 instead of 4. Work 4 additional sc rows in the bodice. Add one more lace sequence to the skirt with an additional increase round. Add approximately 100 to 150 extra yards of MC.
- For size 18 months: remove 2 raglan increase rows. Reduce bodice rows by 3. Remove the final lace sequence from the skirt.
- To adjust length only: add or subtract one complete 8-round lace sequence between increase rounds — each sequence adds approximately 1.5 to 2 inches of length.
Final Thoughts
This dress takes time and patience, but the result is absolutely worth every stitch. There is something deeply satisfying about creating a garment this beautiful with your own hands. When you see a little one twirling in that lace skirt, daisies bouncing at her waist, you will understand why this pattern lived in my notebook for years.
Block your finished dress carefully for the best drape and stitch definition — the lace really opens up and shines after a proper wet block. Pin it to your Pinterest boards so you can find it when the right occasion comes along, because this is the kind of make that deserves to be worn somewhere special.



