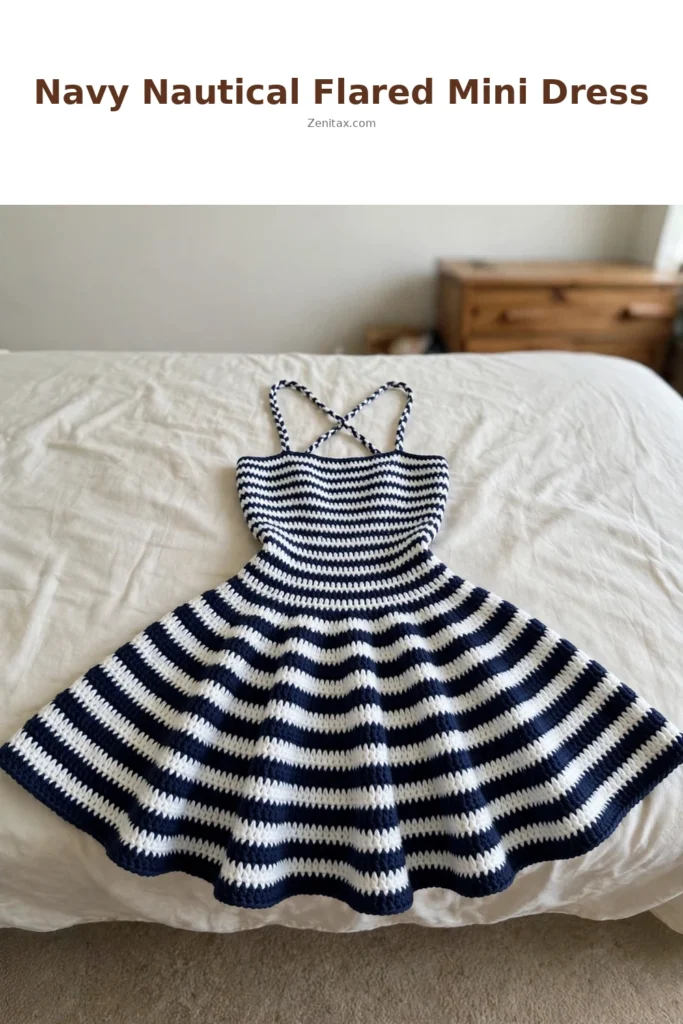
A navy nautical striped mini dress that looks straight off a vintage postcard? Let us make it happen. This dress is worked top down in continuous rounds with just one stitch — single crochet — so the construction is about as straightforward as garments get. The stripes do all the visual work.
Here is what makes this pattern so clever: negative ease in the bodice gives you that fitted sailor look without any complicated shaping, then aggressive increase rounds turn the skirt into a dramatic 1950s flare. And because you never turn your work or join rounds, the whole thing is one smooth, seamless tube until the finishing.
Fair warning: this is a big project. The skirt grows to 280 stitches at the hem, so the later rounds take real time. But if you love rhythmic, meditative crochet with a showstopper payoff, this dress is your next big make.
Why You Will Love This Navy Nautical Flared Mini Dress
The silhouette is everything here. Fitted bodice, nipped waist, dramatically flared skirt — it fans out like a vintage sundress. The squared neckline and spaghetti-style braided straps finish the sailor look.
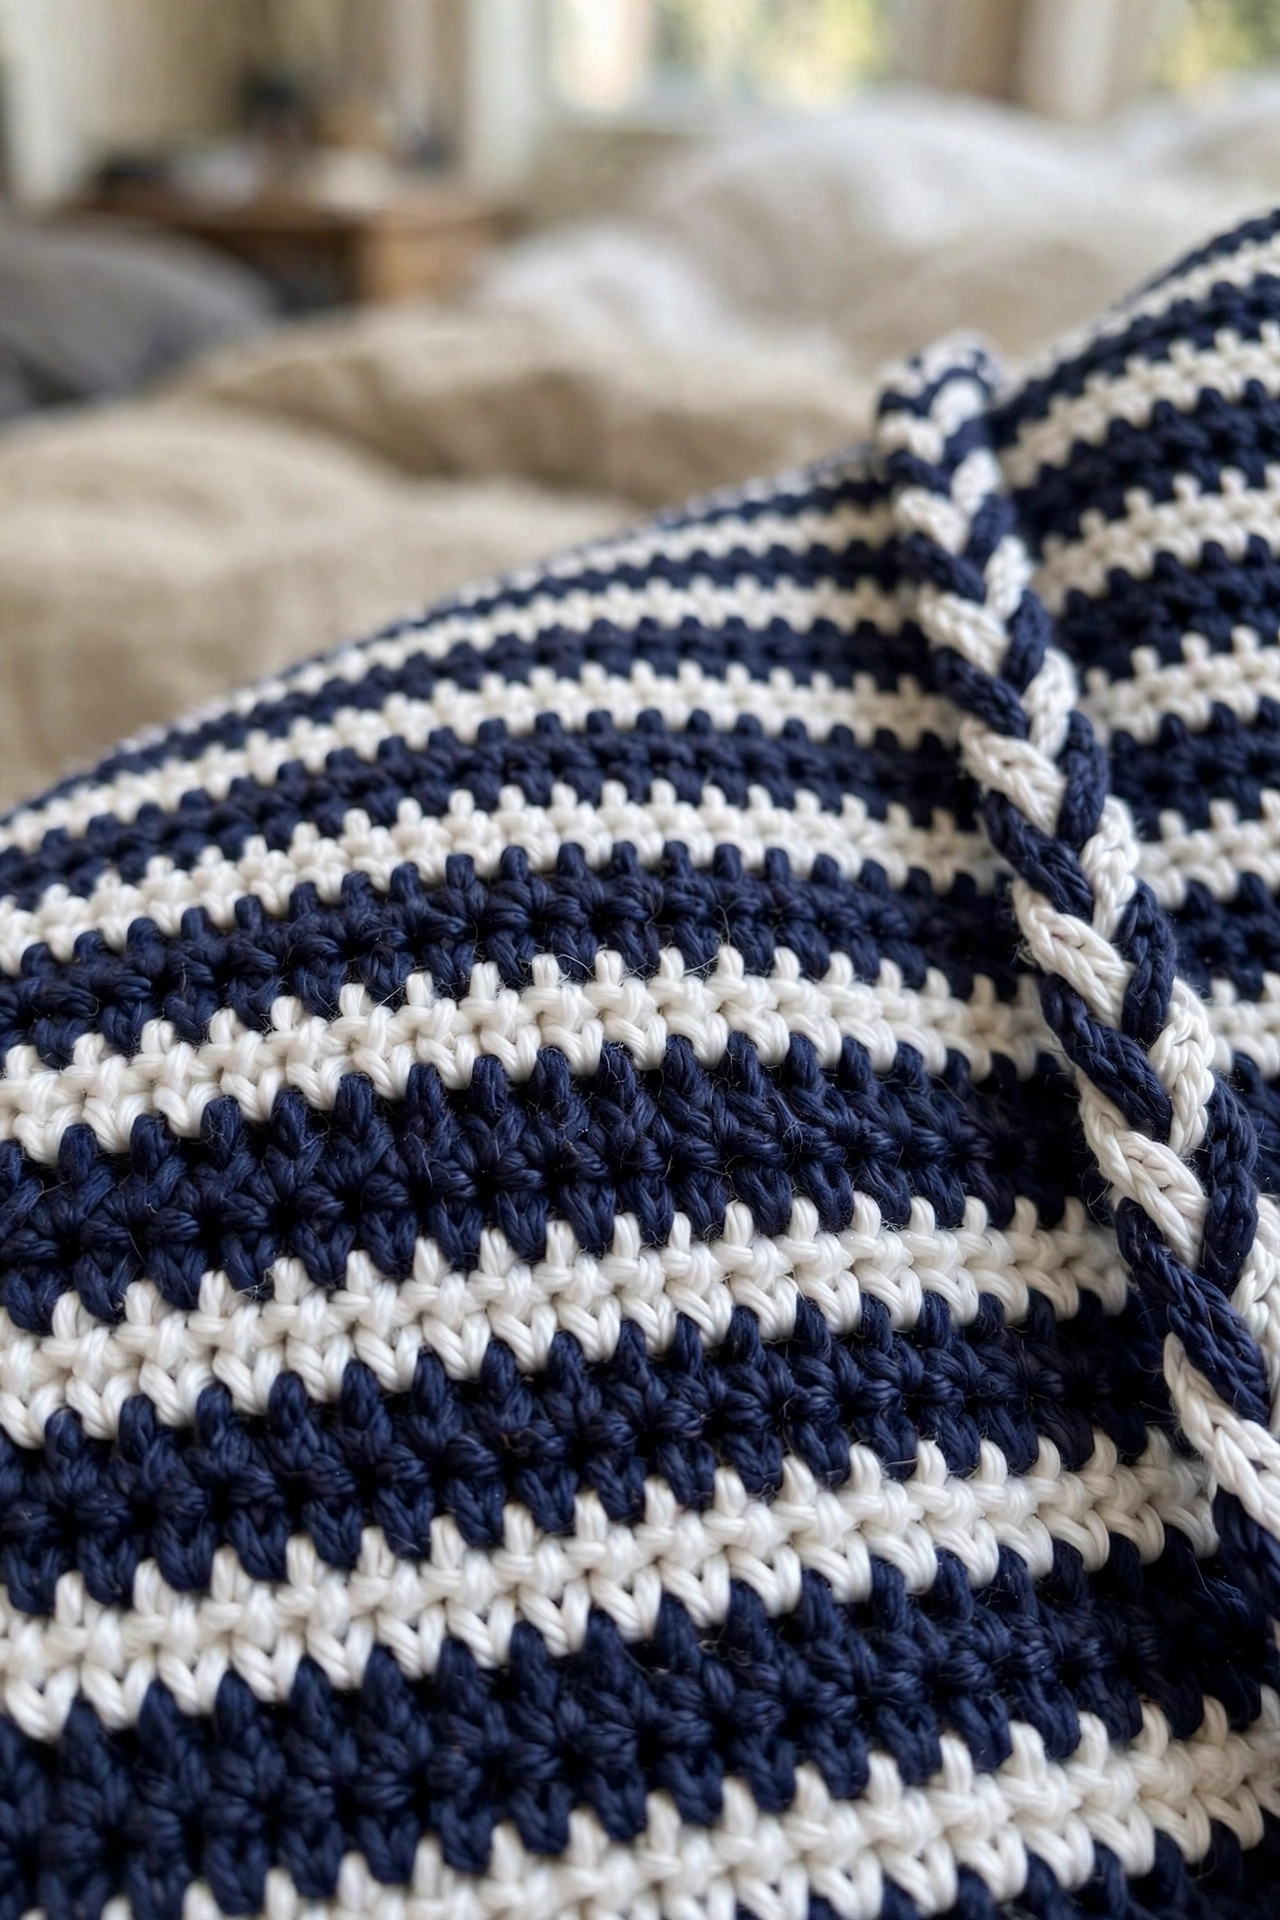
The stripe colorwork sounds fancier than it is. You alternate colors every two or three rounds and carry the unused yarn up the inside by crocheting over it loosely. No charts, no floats, no cutting and rejoining every round.
Cotton or cotton-blend yarn is strongly recommended. Cotton has less stretch than acrylic, which keeps the fitted bodice in shape, and it gives excellent stitch definition so the navy and white stripes pop beautifully.
Skill Level and Time Commitment
This is an intermediate crochet pattern. The stitches themselves are beginner-friendly — single crochet throughout — but the project asks for comfort with continuous rounds without joining, stripe colorwork management, evenly spaced increase and decrease rounds, and simple braided embellishments.
If you have never made a garment before, this is a great first dress project because the construction is straightforward. The challenge is keeping your tension even and managing two colors neatly.
Time estimate: Approximately 25 to 40 hours depending on your speed. The bodice takes roughly 8 to 12 hours. The skirt, with its growing stitch counts, takes 15 to 25 hours. Finishing, blocking, and the braided straps add 2 to 3 hours.
Materials You Will Need
Gather everything before you start and the project flows so much better. Here is what you need:
Yarn:
- Yarn A (Navy): Approximately 900 yards / 823 meters
- Yarn B (White): Approximately 700 yards / 640 meters
- Total: Approximately 1600 yards / 1463 meters
- Yarn weight: DK weight (CYCA #3 Light), 100% cotton or cotton-blend recommended
Suggested yarn options:
- Lion Brand 24/7 Cotton (100% mercerized cotton, 186 yards per 100g skein) — smooth with excellent stitch definition. You will need approximately 5 skeins Navy and 4 skeins White.
- Paintbox Yarns Simply DK (100% premium acrylic, 137 yards per 50g ball) — budget-friendly with great color saturation. You will need approximately 7 balls Navy and 6 balls White.
- Drops Safran (50% cotton, 50% linen, 175 yards per 50g ball) — the linen content adds structured drape that suits the nautical aesthetic. You will need approximately 6 balls Navy and 5 balls White.
Avoid fuzzy or hairy yarns — they obscure the crisp stripe contrast.
Hook:
- US size E-4 / 3.5 mm crochet hook (or size needed to obtain gauge)
Notions:
- Stitch markers (at least 4)
- Tapestry needle for weaving ends
- Measuring tape
- Scissors
- Optional: dress form or blocking mats
Gauge
20 sc x 22 rows = 4 inches / 10 cm in single crochet, worked in continuous rounds, blocked.
Gauge is mandatory for this garment. A difference of even 1 stitch per 4 inches will result in a significant size difference across the bodice circumference. Make a flat gauge swatch at least 5 inches x 5 inches, block it, then measure the center 4 inches. Adjust your hook size up or down as needed before beginning.
Finished Measurements
This pattern is written for a Size Small/Medium as shown in the reference images.
| Measurement | Size |
|---|---|
| Bust | 34 inches / 86 cm (1-2 inches negative ease) |
| Waist | 28 inches / 71 cm |
| Hip at skirt flare | 38 inches / 97 cm |
| Total length (top to hem) | 26 inches / 66 cm |
| Bodice length | 9 inches / 23 cm |
| Skirt length | 17 inches / 43 cm |
Size customization tips are included at the end of the pattern.
Abbreviations and Stitch Definitions
Every abbreviation in this pattern, decoded in plain English:
- ch = chain: Wrap yarn over hook and pull through the loop on your hook
- sl st = slip stitch: Insert hook, yarn over, pull through both the stitch and the loop on hook in one motion
- sc = single crochet: Insert hook in stitch, yarn over and pull up a loop (2 loops on hook), yarn over and pull through both loops
- sc2tog = single crochet two together (decrease): Insert hook in next stitch, pull up a loop, insert hook in the following stitch, pull up a loop (3 loops on hook), yarn over and draw through all 3 loops
- inc = single crochet increase: Work 2 sc in the same stitch
- st(s) = stitch(es)
- rnd = round
- rep = repeat
- pm = place marker
- sm = slip marker
- RS = right side
- WS = wrong side
- cont = continue
- rem = remaining
- YA = Yarn A (Navy)
- YB = Yarn B (White)
Special Techniques
Stripe Single Crochet
This dress uses single crochet in continuous rounds with color changes carried up the inside. At the last yarn-over of the final sc before a color change, pull through the new color instead of the working color. Do not cut yarn between colors. Carry the unused yarn along the inside by crocheting over it loosely on every round it is not in use. This keeps floats short and the interior neat.
Working in Continuous Rounds
You will work without turning and without joining at the end of each round. Place a removable stitch marker at the beginning of each round and move it up as you work. The right side faces outward at all times. Because rounds spiral slightly, you may notice a slight jog between color changes. This is normal for continuous-round stripe work.
Braided Straps
Each strap is made from 3 individual crochet chains worked with both colors held together, then braided. Full instructions appear in the Straps section.
Pattern Notes Before You Begin
- The dress is worked in continuous rounds from the top down with no join or turning chain.
- The foundation chain forms the neckline and is joined to create a ring.
- The bodice achieves its fitted look through negative ease. The single crochet fabric stretches around the body.
- Waist shaping uses decrease rounds followed by increase rounds.
- The skirt flare is created through aggressive, evenly spaced increase rounds. The skirt grows from 140 stitches at the waist to 280 stitches at the hem.
- Bodice stripe sequence: 2 rounds YA, 2 rounds YB, repeated throughout.
- Skirt stripe sequence: 3 rounds YA, 3 rounds YB, repeated throughout.
- All stitch counts include the marker stitch.
Pattern Instructions
Bodice
Foundation Chain:
Using YA and the E-4 / 3.5 mm hook, ch 170. Without twisting, sl st to first ch to join into a ring. Be very careful not to twist the chain. This is the neckline edge.
Set-Up Round (Round 1): Using YA, sc in each ch around. Do not join. Pm at first stitch of round. (170 sc)
Now begin the stripe sequence. The bodice stripe is 2 rounds YA, 2 rounds YB throughout. Round 1 is YA Round 1.
Rounds 2 through 20: Sc in each st around. (170 sc) Work the 2-round stripe rhythm as follows:
- Rounds 2, 5, 6, 9, 10, 13, 14, 17, 18: YA
- Rounds 3, 4, 7, 8, 11, 12, 15, 16, 19, 20: YB
Change colors on the final yarn-over of the last sc of Rounds 2, 4, 6, 8, 10, 12, 14, 16, and 18.
CHECKPOINT: After Round 20, the bodice tube should measure approximately 3.6 inches / 9 cm tall. You should see 5 complete 2-round YA stripes and 5 complete 2-round YB stripes.
Waist Shaping
The waist shaping decreases the stitch count to create a nipped waist, then increases back out to the hip.
At the end of Round 20, change to YA.
Round 21 (YA) – Decrease Round: (Sc 16, sc2tog) 10 times. (160 sc)
Round 22 (YA): Sc in each st around. (160 sc)
At the end of Round 22, change to YB.
Round 23 (YB): Sc in each st around. (160 sc)
Round 24 (YB): Sc in each st around. (160 sc)
At the end of Round 24, change to YA.
Round 25 (YA) – Decrease Round: (Sc 14, sc2tog) 10 times. (150 sc)
Round 26 (YA): Sc in each st around. (150 sc)
At the end of Round 26, change to YB.
Round 27 (YB): Sc in each st around. (150 sc)
Round 28 (YB): Sc in each st around. (150 sc)
At the end of Round 28, change to YA.
Round 29 (YA) – Decrease Round: (Sc 13, sc2tog) 10 times. (140 sc)
Round 30 (YA): Sc in each st around. (140 sc)
CHECKPOINT: After Round 30, the total piece height should be approximately 5.5 inches / 14 cm. The circumference should measure approximately 28 inches / 71 cm. This is your waist.
At the end of Round 30, change to YB.
Round 31 (YB): Sc in each st around. (140 sc)
Round 32 (YB): Sc in each st around. (140 sc)
At the end of Round 32, change to YA.
Hip Transition
The next rounds work back up to 170 stitches, moving from waist to full hip.
Round 33 (YA) – Increase Round: (Sc 13, inc) 10 times. (150 sc)
Round 34 (YA): Sc in each st around. (150 sc)
At the end of Round 34, change to YB.
Round 35 (YB) – Increase Round: (Sc 14, inc) 10 times. (160 sc)
Round 36 (YB): Sc in each st around. (160 sc)
At the end of Round 36, change to YA.
Round 37 (YA) – Increase Round: (Sc 15, inc) 10 times. (170 sc)
Round 38 (YA): Sc in each st around. (170 sc)
At the end of Round 38, change to YB.
Round 39 (YB): Sc in each st around. (170 sc)
Round 40 (YB): Sc in each st around. (170 sc)
CHECKPOINT: After Round 40, total piece height should be approximately 7.3 inches / 18.5 cm. Hip circumference should measure approximately 34 inches / 86 cm. You are now at the top of the skirt.
Skirt
The skirt begins here. The stripe sequence changes to 3 rounds YA, 3 rounds YB. Increase rounds are placed regularly to create the dramatic flare.
At the end of Round 40, change to YA.
Skirt Increase Block 1 (Rounds 41–46):
Round 41 (YA) – Increase Round 1: (Sc 16, inc) 10 times. (180 sc)
Rounds 42–43 (YA): Sc in each st around. (180 sc)
At the end of Round 43, change to YB.
Rounds 44–46 (YB): Sc in each st around. (180 sc)
At the end of Round 46, change to YA.
Skirt Increase Block 2 (Rounds 47–52):
Round 47 (YA) – Increase Round 2: (Sc 17, inc) 10 times. (190 sc)
Rounds 48–49 (YA): Sc in each st around. (190 sc)
At the end of Round 49, change to YB.
Rounds 50–52 (YB): Sc in each st around. (190 sc)
At the end of Round 52, change to YA.
Skirt Increase Block 3 (Rounds 53–58):
Round 53 (YA) – Increase Round 3: (Sc 18, inc) 10 times. (200 sc)
Rounds 54–55 (YA): Sc in each st around. (200 sc)
At the end of Round 55, change to YB.
Rounds 56–58 (YB): Sc in each st around. (200 sc)
At the end of Round 58, change to YA.
Skirt Increase Block 4 (Rounds 59–64):
Round 59 (YA) – Increase Round 4: (Sc 19, inc) 10 times. (210 sc)
Rounds 60–61 (YA): Sc in each st around. (210 sc)
At the end of Round 61, change to YB.
Rounds 62–64 (YB): Sc in each st around. (210 sc)
At the end of Round 64, change to YA.
Skirt Increase Block 5 (Rounds 65–70):
Round 65 (YA) – Increase Round 5: (Sc 20, inc) 10 times. (220 sc)
Rounds 66–67 (YA): Sc in each st around. (220 sc)
At the end of Round 67, change to YB.
Rounds 68–70 (YB): Sc in each st around. (220 sc)
At the end of Round 70, change to YA.
Skirt Increase Block 6 (Rounds 71–76):
Round 71 (YA) – Increase Round 6: (Sc 21, inc) 10 times. (230 sc)
Rounds 72–73 (YA): Sc in each st around. (230 sc)
At the end of Round 73, change to YB.
Rounds 74–76 (YB): Sc in each st around. (230 sc)
At the end of Round 76, change to YA.
Skirt Increase Block 7 (Rounds 77–82):
Round 77 (YA) – Increase Round 7: (Sc 22, inc) 10 times. (240 sc)
Rounds 78–79 (YA): Sc in each st around. (240 sc)
At the end of Round 79, change to YB.
Rounds 80–82 (YB): Sc in each st around. (240 sc)
At the end of Round 82, change to YA.
Skirt Increase Block 8 (Rounds 83–88):
Round 83 (YA) – Increase Round 8: (Sc 23, inc) 10 times. (250 sc)
Rounds 84–85 (YA): Sc in each st around. (250 sc)
At the end of Round 85, change to YB.
Rounds 86–88 (YB): Sc in each st around. (250 sc)
At the end of Round 88, change to YA.
Skirt Increase Block 9 (Rounds 89–94):
Round 89 (YA) – Increase Round 9: (Sc 24, inc) 10 times. (260 sc)
Rounds 90–91 (YA): Sc in each st around. (260 sc)
At the end of Round 91, change to YB.
Rounds 92–94 (YB): Sc in each st around. (260 sc)
At the end of Round 94, change to YA.
Skirt Increase Block 10 (Rounds 95–100):
Round 95 (YA) – Increase Round 10: (Sc 25, inc) 10 times. (270 sc)
Rounds 96–97 (YA): Sc in each st around. (270 sc)
At the end of Round 97, change to YB.
Rounds 98–100 (YB): Sc in each st around. (270 sc)
At the end of Round 100, change to YA.
Skirt Increase Block 11 (Rounds 101–106):
Round 101 (YA) – Increase Round 11: (Sc 26, inc) 10 times. (280 sc)
Rounds 102–103 (YA): Sc in each st around. (280 sc)
At the end of Round 103, change to YB.
Rounds 104–106 (YB): Sc in each st around. (280 sc)
CHECKPOINT: After Round 106, total piece height should be approximately 26 inches / 66 cm from neckline. Hem circumference should measure approximately 56 inches / 142 cm. The skirt should fan outward dramatically.
Hem Finish
At the end of Round 106, with YA, sl st in each st around the hem edge. This creates a clean, firm navy border. Fasten off. Weave in end.
Neckline Finish
With YA and hook, join yarn at any point along the top neckline edge. Sl st in each st around the neckline. Sl st to join. Fasten off. Weave in end. This stabilizes the neckline and creates a matching navy edge.
Braided Straps
The dress has 2 braided spaghetti straps. Each strap is composed of 3 crocheted cords braided together.
Strap Cord (make 6 total, 3 per strap):
With YA and YB held together as one, ch 90. Fasten off leaving a 12-inch / 30 cm tail at each end for attachment.
Braiding the Strap:
Group 3 cords together. Hold all 3 at one end and tie a loose knot to anchor during braiding. Braid in a standard 3-strand braid. When complete, the braided strap should measure approximately 12 inches / 30 cm.
Strap Attachment:
Hold the bodice with the right side facing. Identify front center. Measure 3.5 inches / 9 cm to the left and right of center. These are the front attachment points.
Thread tail ends onto a tapestry needle. Insert through the front neckline edge at the attachment point from outside to inside, passing through 2 to 3 stitches. Knot firmly on the inside. Double-secure with another knot.
For back attachment, try the dress on or place it on a dress form. Bring the straps over your shoulders to a comfortable length and mark the back attachment points. Attach as described above.
Trim the excess after knotting. Finished braids should sit flat across the shoulder.
Blocking and Finishing
Weave in all ends throughout the dress. There will be many color-change ends along the inside of the bodice. Weave each over at least 1 inch in multiple directions to prevent unraveling.
Wet blocking: Submerge the dress in cool water. Gently press out excess water without wringing. Roll in a clean towel. Lay flat on blocking mats. Shape the bodice to the correct dimensions. Fan out the skirt evenly in a circular shape. Pin the hem if desired. Allow to dry completely, approximately 24 to 48 hours.
Blocking is especially important for cotton to set stitch definition and relax the fabric.
Size Customization Tips
- To size up: Add stitches to the foundation chain in multiples of 10. Adding 10 stitches (chain 180) adds approximately 2 inches of circumference. Adjust the waist decrease math proportionally.
- To size down: Subtract stitches in multiples of 10. Chain 160 for size XS.
- To lengthen the bodice: Add more 2-round stripe repeats between the neckline and waist shaping. Each 2-round repeat adds approximately 0.36 inches.
- To lengthen the skirt: Add more 6-round increase blocks after Round 106. Each block adds approximately 1.1 inches and 10 stitches.
- To shorten: Remove skirt increase blocks from the end. Fewer blocks will also reduce flare width.
Care Instructions
Machine wash on gentle in cold water if using machine-washable cotton. Use a mesh laundry bag to protect the braided straps. Do not tumble dry. Lay flat or hang briefly to dry. Do not wring or twist. Iron on low with a pressing cloth if needed. Store folded or hung, but avoid long-term hanging as the weight may stretch the neckline.
Tips for Success
- Do not skip the gauge swatch. Even 1 stitch per 4 inches off will noticeably change the bodice circumference.
- Move your round marker up every single round. In continuous rounds, losing your place is easy and painful.
- Weave in ends as you finish each color block instead of saving them all for the end.
- Try the dress on before attaching the back straps. Strap length is personal — get it right while you can still adjust.
- Block it. Blocking sets the stitch definition and relaxes the cotton, and it makes all the difference in the finished look.
Final Thoughts
I hope you enjoy making this navy nautical flared mini dress as much as I enjoyed writing it up. The combination of simple stitches, satisfying colorwork, and that gorgeous vintage silhouette makes this project truly rewarding. Take your time with the gauge swatch, trust the process as your skirt grows wider and wider, and do not forget to block.
Thank you so much for choosing this pattern. I would absolutely love to see your finished dress. Tag me on Instagram or share a photo in our crochet community. Seeing your makes is genuinely the best part of designing.
If this pattern has inspired you, go ahead and save it to your Pinterest boards so you can find it when you are ready to start. And please drop a comment below if you make this dress. I read every single one and love hearing about your projects. Happy crocheting!